> For the complete documentation index, see [llms.txt](https://docs.defguard.net/llms.txt). Markdown versions of documentation pages are available by appending `.md` to page URLs; this page is available as [Markdown](https://docs.defguard.net/deployment-strategies/running-gateway-on-opnsense-firewall.md).
# Running Gateway on OPNsense firewall
## OPNsense plugin
[OPNsense®](https://opnsense.org/) is an open source, feature rich firewall and routing platform, offering cutting-edge network protection.
To start Defguard Gateway as OPNsense plugin:
1. On the [release page](https://github.com/DefGuard/gateway/releases) find and download OPNsense package which will be named:\
`defguard-gateway_VERSION_x86_64-unknown-opnsense.pkg` – this package **includes both Defguard Gateway and OPNsense plugin.**
2. Install the package:
```sh
pkg add defguard-gateway_VERSION_x86_64-unknown-opnsense.pkg
```
3. Refresh your OPNsense UI by running command below:
```sh
opnsense-patch
```
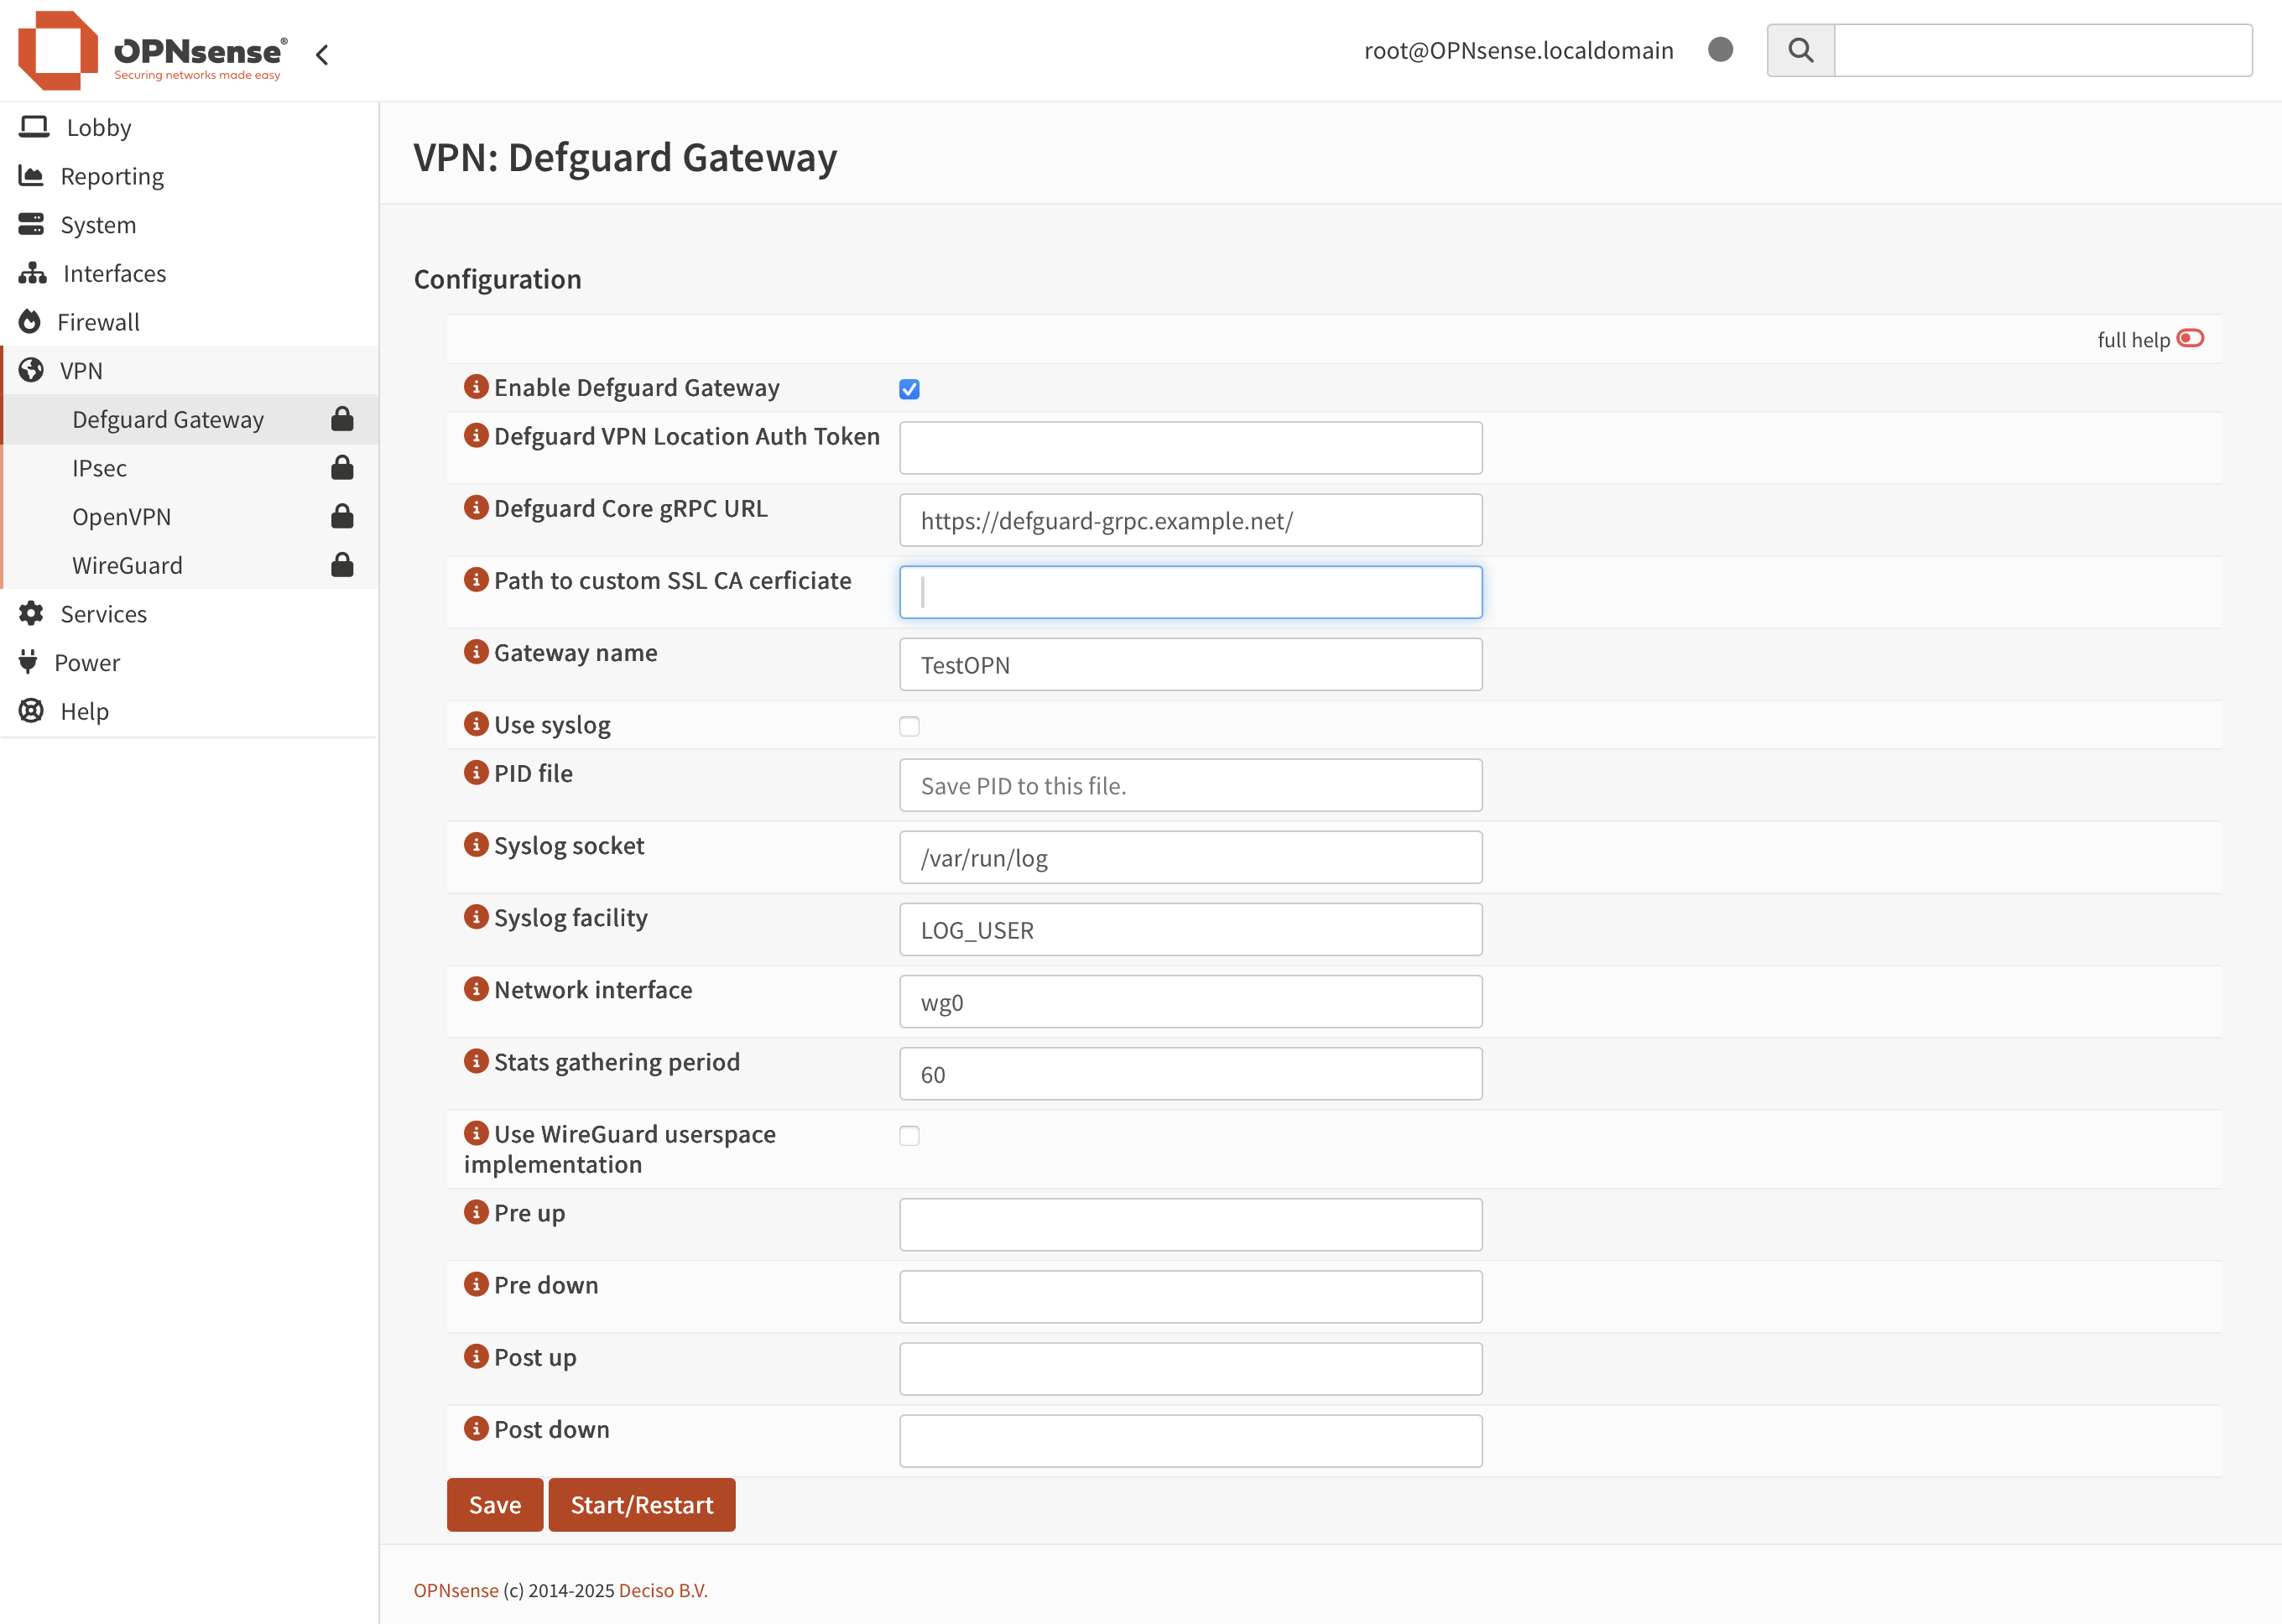
4. Go to your OPNsense UI and navigate to **VPN** → **Defguard Gateway**.
5. Fill out the form with appropriate values, click **Save**, and then click **Start/Restart.**
{% hint style="info" %}
You can find detailed description of all fields [here](/deployment-strategies/configuration.md#gateway-deployment-parameters).
{% endhint %}
At this point the Gateway should be connected to Defguard Core. Before users can reach anything through it, OPNsense itself still needs an interface, a NAT rule and a firewall rule - continue with [#opnsense-network-configuration](#opnsense-network-configuration "mention").
## OPNsense network configuration
The steps below are based on the [WireGuard Road Warrior Setup](https://docs.opnsense.org/manual/how-tos/wireguard-client.html) from the OPNsense documentation.
### Assign a network interface to Defguard
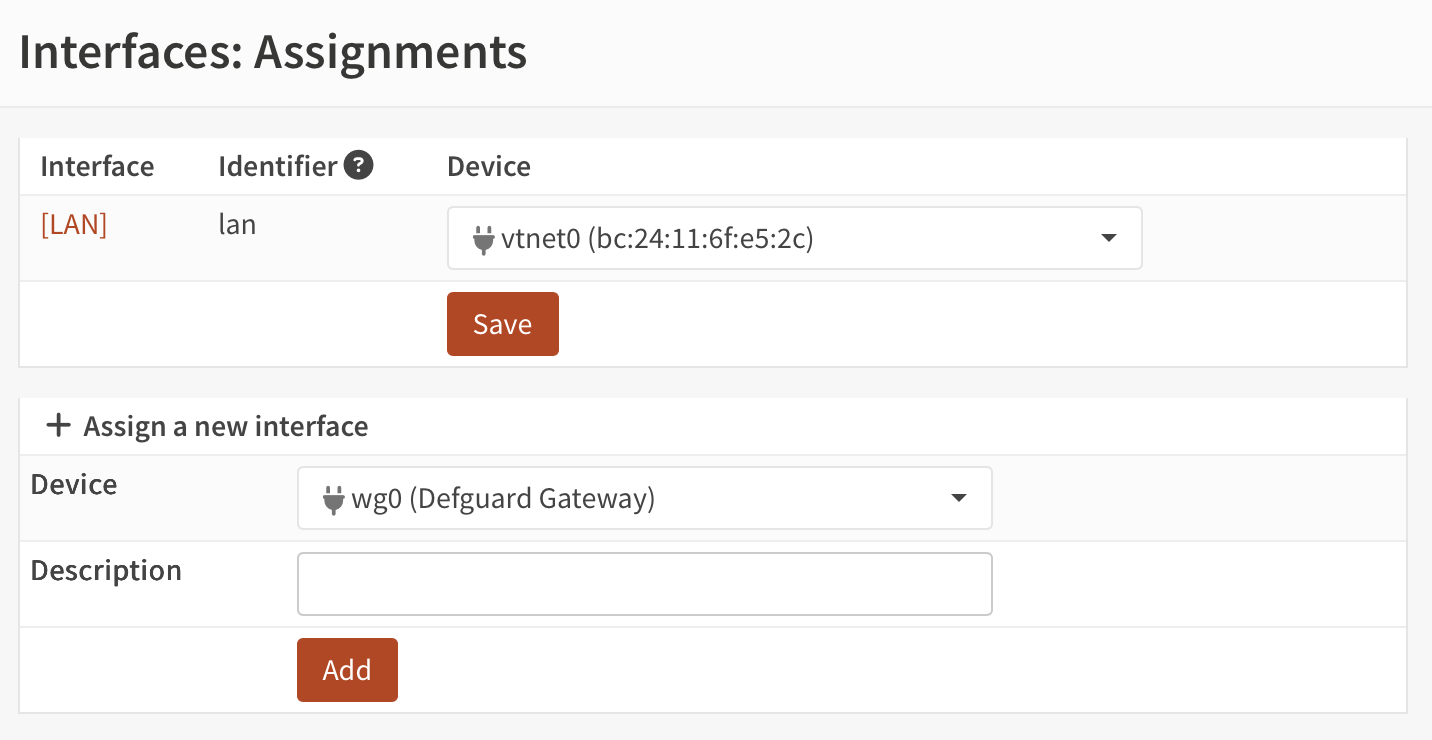
1. Go to **Interfaces → Assignments**
2. Under **Assign a new interface**, select the Defguard Gateway network interface (e.g. *wg0*)
3. Add a description, for example *ParisOfficeVPN*
4. Click **Add**
5. Select the newly create interface by clicking on its name (in this example *\[ParisOfficeVPN]*).
6. Select **Enable Interface**
7. Select **Prevent interface removal**
8. Click **Save**, and then **Apply changes**
### Create an outbound NAT rule
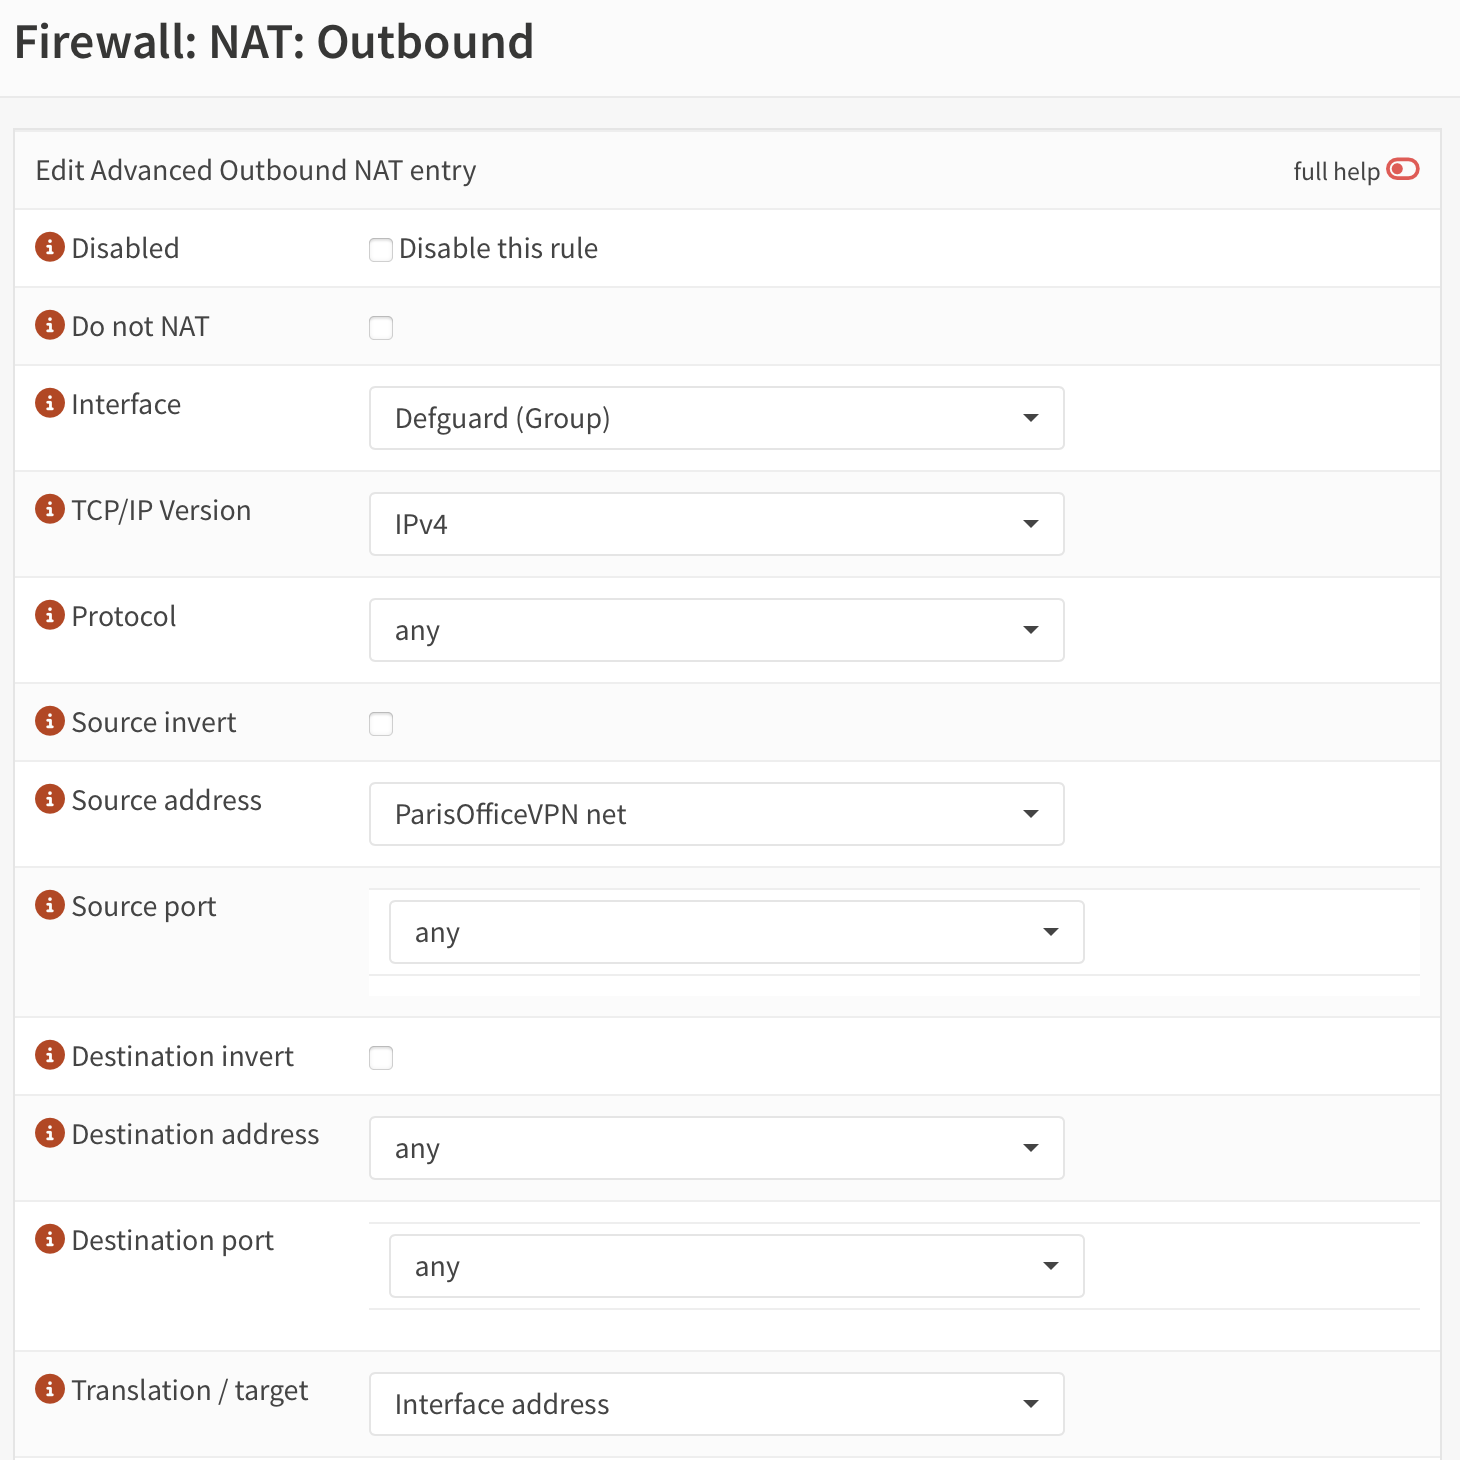
1. Go to **Firewall → NAT → Outbound**
2. Make sure the selected **Mode** is **Hybrid outbound NAT rule generation**; if it wasn't selected, click **Save** and then **Apply changes**
3. Under **Manual rules**, add a new rule by clicking **+**.
4. Select **Interface** – this should be either WAN or LAN, depending on the needs.
5. Select **TCP/IP version** – either IPv4 or IPv6.
6. Select **Source address** – this should be interface name assigned above plus *net*, e.g. *ParisOfficeVPN net*.
7. Click **Save**, and then **Apply changes**
### Add firewall rules to allow WireGuard traffic in
1. Go to **Firewall → Rules → WAN**
2. Click **+** (plus) to add a new rule
3. The rule should *Pass* the traffic *in* with *quick* option enabled
4. Select **WAN** interface
5. Choose **TCP/IP version** of your desire
6. Select **UDP** protocol.
7. Set **Destination** to **WAN address** and port to the port number provided in Defguard Core: *Location configuration → Gateway port*
8. Click **Save**, and then **Apply changes**
Once this is done you can start [adding new devices to your network](/features/wireguard/remote-desktop-activation.md).
## Binary Install
Use this method if you are not running the OPNsense plugin.
1. Checkout Gateway releases [here](https://github.com/DefGuard/gateway/releases) and download compatible binary from GitHub page.
2. Decompress and move to bin directory
```sh
tar xcf ./gateway.tar.gz
sudo chmod +x gateway
sudo mv gateway /usr/bin/
```
3. Start the gateway, pointing it at its configuration file:
```sh
gateway --config /etc/defguard/gateway.toml
```
4. Adopt the gateway in Defguard Core, as described in [Adopt the Gateway component](/tutorials/initial-setup-wizard-setting-up-from-scratch.md#adopt-the-gateway-component).