JumpCloud
Login to your JumpCloud admin account.
Navigate to SSO Applications\
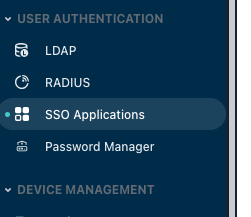
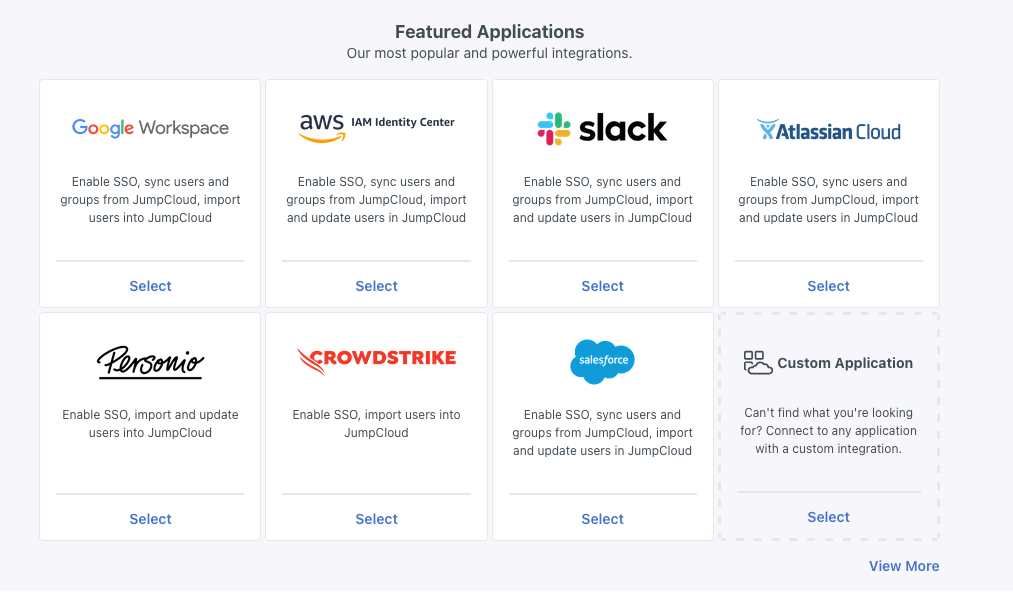
Add a new SSO Application
Select "Custom" on this screen.
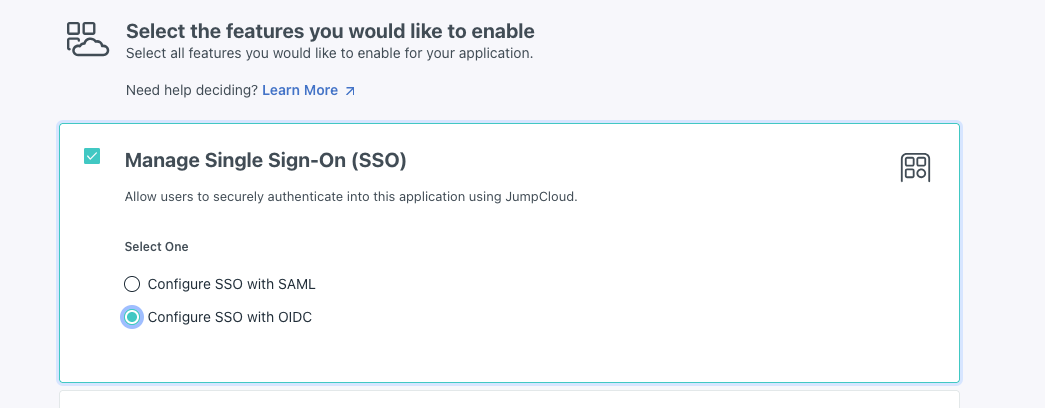
Select "Configure SSO with OIDC".
Fill the app's display label in the next form.\
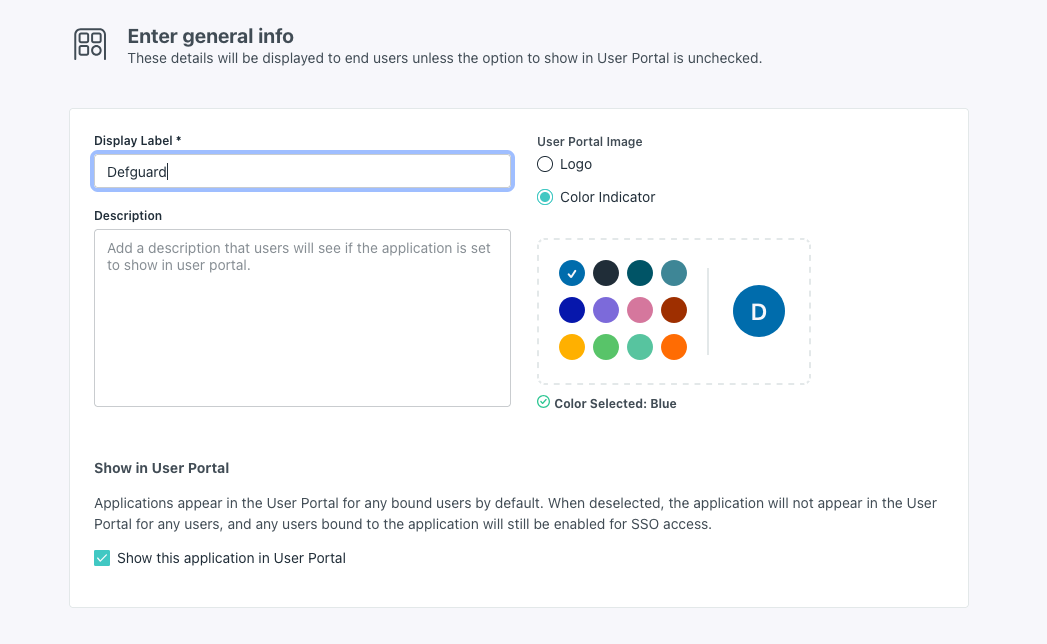
After finishing this configuration, you will be redirected to your newly created SSO Application's settings. Go to the "SSO" tab first.
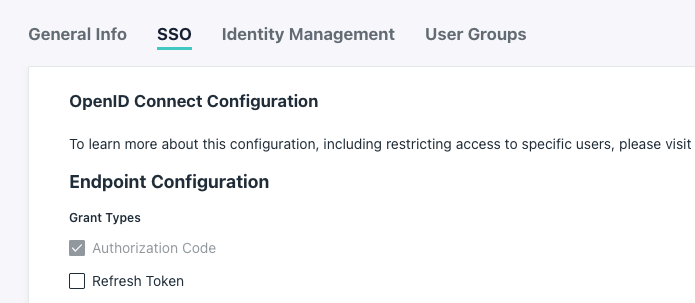
Configure as following:
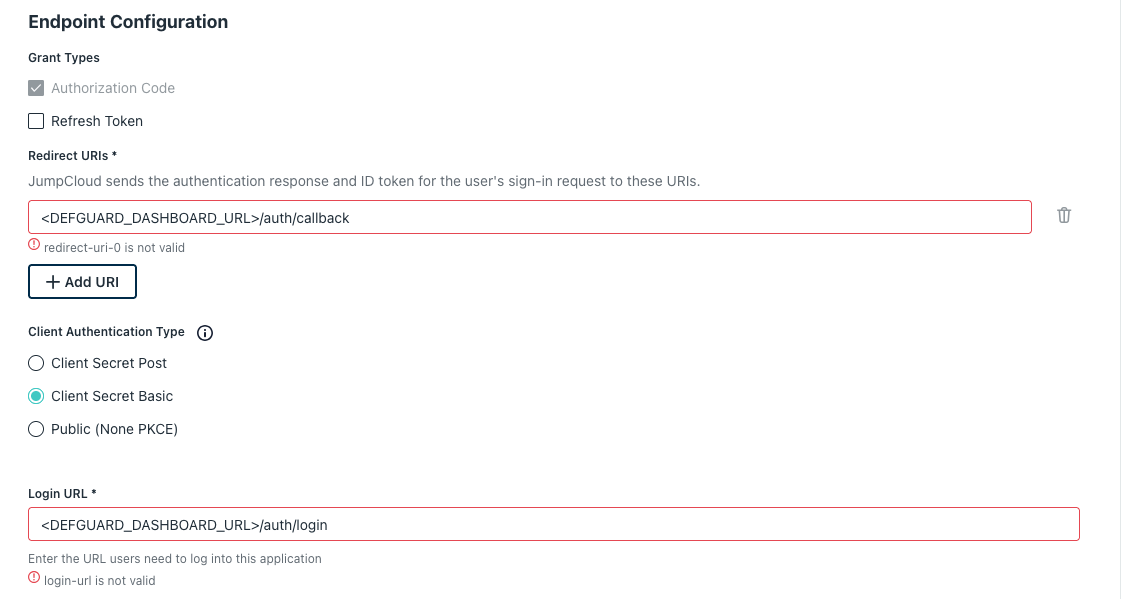
Make sure to set the correct Redirect URI and Login URL that will reflect your Defguard's setup. If you access your Defguard dashboard at e.g.
https://defguard.example.netyour redirect URI will behttps://defguard.example.net/auth/callbackand the login URLhttps://defguard.example.net/auth/login. Additionally, if you are using a Defguard proxy to enroll users, you can also add another redirect URI in the form of<DEFGUARD_ENROLLMENT_URL>/openid/callbackand<DEFGUARD_ENROLLMENT_URL>/openid/mfa/callbackif you wish to use the External MFA feature (<DEFGUARD_ENROLLMENT_URL>is the address at which your Proxy enrollment page is accessible).Next, select the profile scope and add an
emailuser attribute mapping by hand, like so: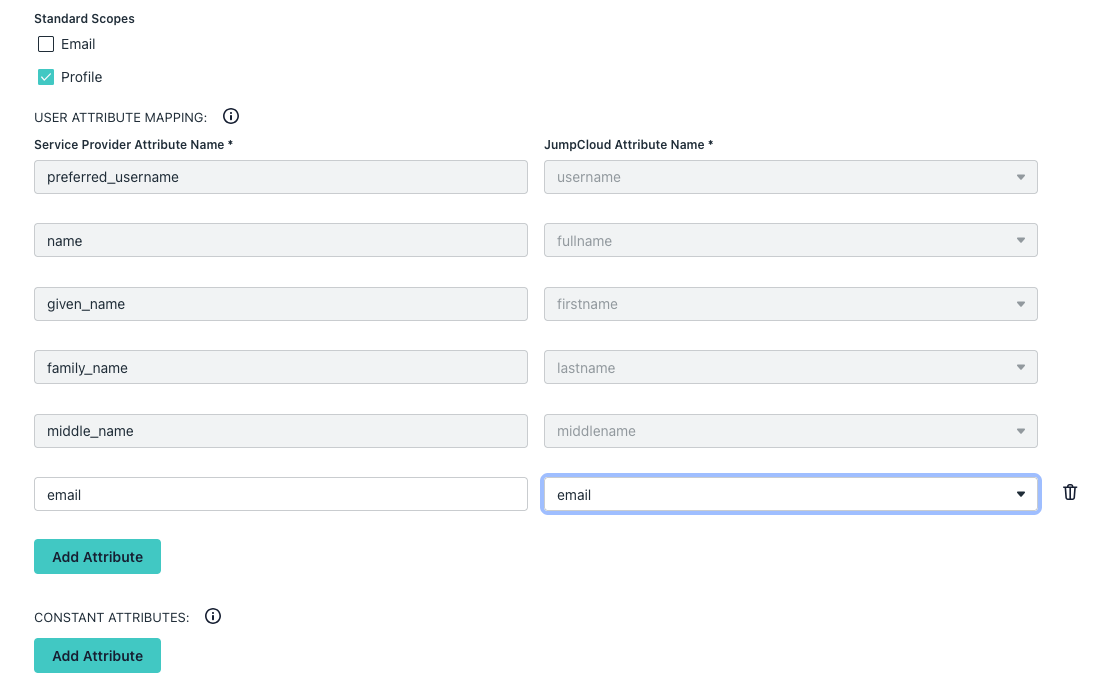
It's important not to select the email standard scope checkbox, as it will automatically add a constant
email_verifiedfield which doesn't conform to the OpenID standard and doesn't work with Defguard. You can see the following section for more information: JumpCloud.Click "Activate". You will be presented with a client ID and a secret. Copy both of them, as you will need to insert them in Defguard's settings.
Go to Defguard settings, OpenID tab, select
JumpCloudprovider tab and paste the copied values:
Back in JumpCloud, make sure your users have access to the SSO Application. You can enable it by navigating to the
User groupsmenu and selecting the group you want to enable logging in through JumpCloud for. Only users from this group will be able to log in to Defguard with JumpCloud. In this example, we will select theAll usersgroup, which is a dynamic group containing every user.Now in the group settings menu, select the
Applicationstab and select the checkbox next to your newly created app, this will enable the app for that group. ClickSave groupwhen you finish.
Now you should be able to log in to Defguard with JumpCloud.
Directory synchronization
Defguard supports synchronizing groups' and users' states based on your JumpCloud directory.
Make sure to check the general guide to directory synchronization to learn more about the available configuration options.
Setup
Because JumpCloud API keys are bound to users and they don't support granular permissions nor generating more than one at a time, we recommend generating the API key for a user with read only permissions, as Defguard doesn't require write permissions to your directory.
Login to your JumpCloud admin portal
Generate a new API key (or use an existing one). This can be done by clicking your user icon in the upper right corner and selecting "My API key"

If you already generated an API key, you will have to regenerate it here (please note that regenerating the API key may break your existing integrations that already use it).

Copy the newly generated API key and navigate to your Defguard instance's settings.
Paste the key into the "JumpCloud API key" field

The JumpCloud directory synchronization should now work and your users' state and group memberships should be periodically synchronized.
Last updated