> For the complete documentation index, see [llms.txt](https://docs.defguard.net/llms.txt). Markdown versions of documentation pages are available by appending `.md` to page URLs; this page is available as [Markdown](https://docs.defguard.net/2.2/features/network-devices.md).
# Network devices
Network devices are like regular user devices but can only be managed by admins and have access to only one network. They are designed to be used with the [Defguard CLI client](broken://pages/yjUb0u49KJzUtjcXA4C6).
## Adding a new network device
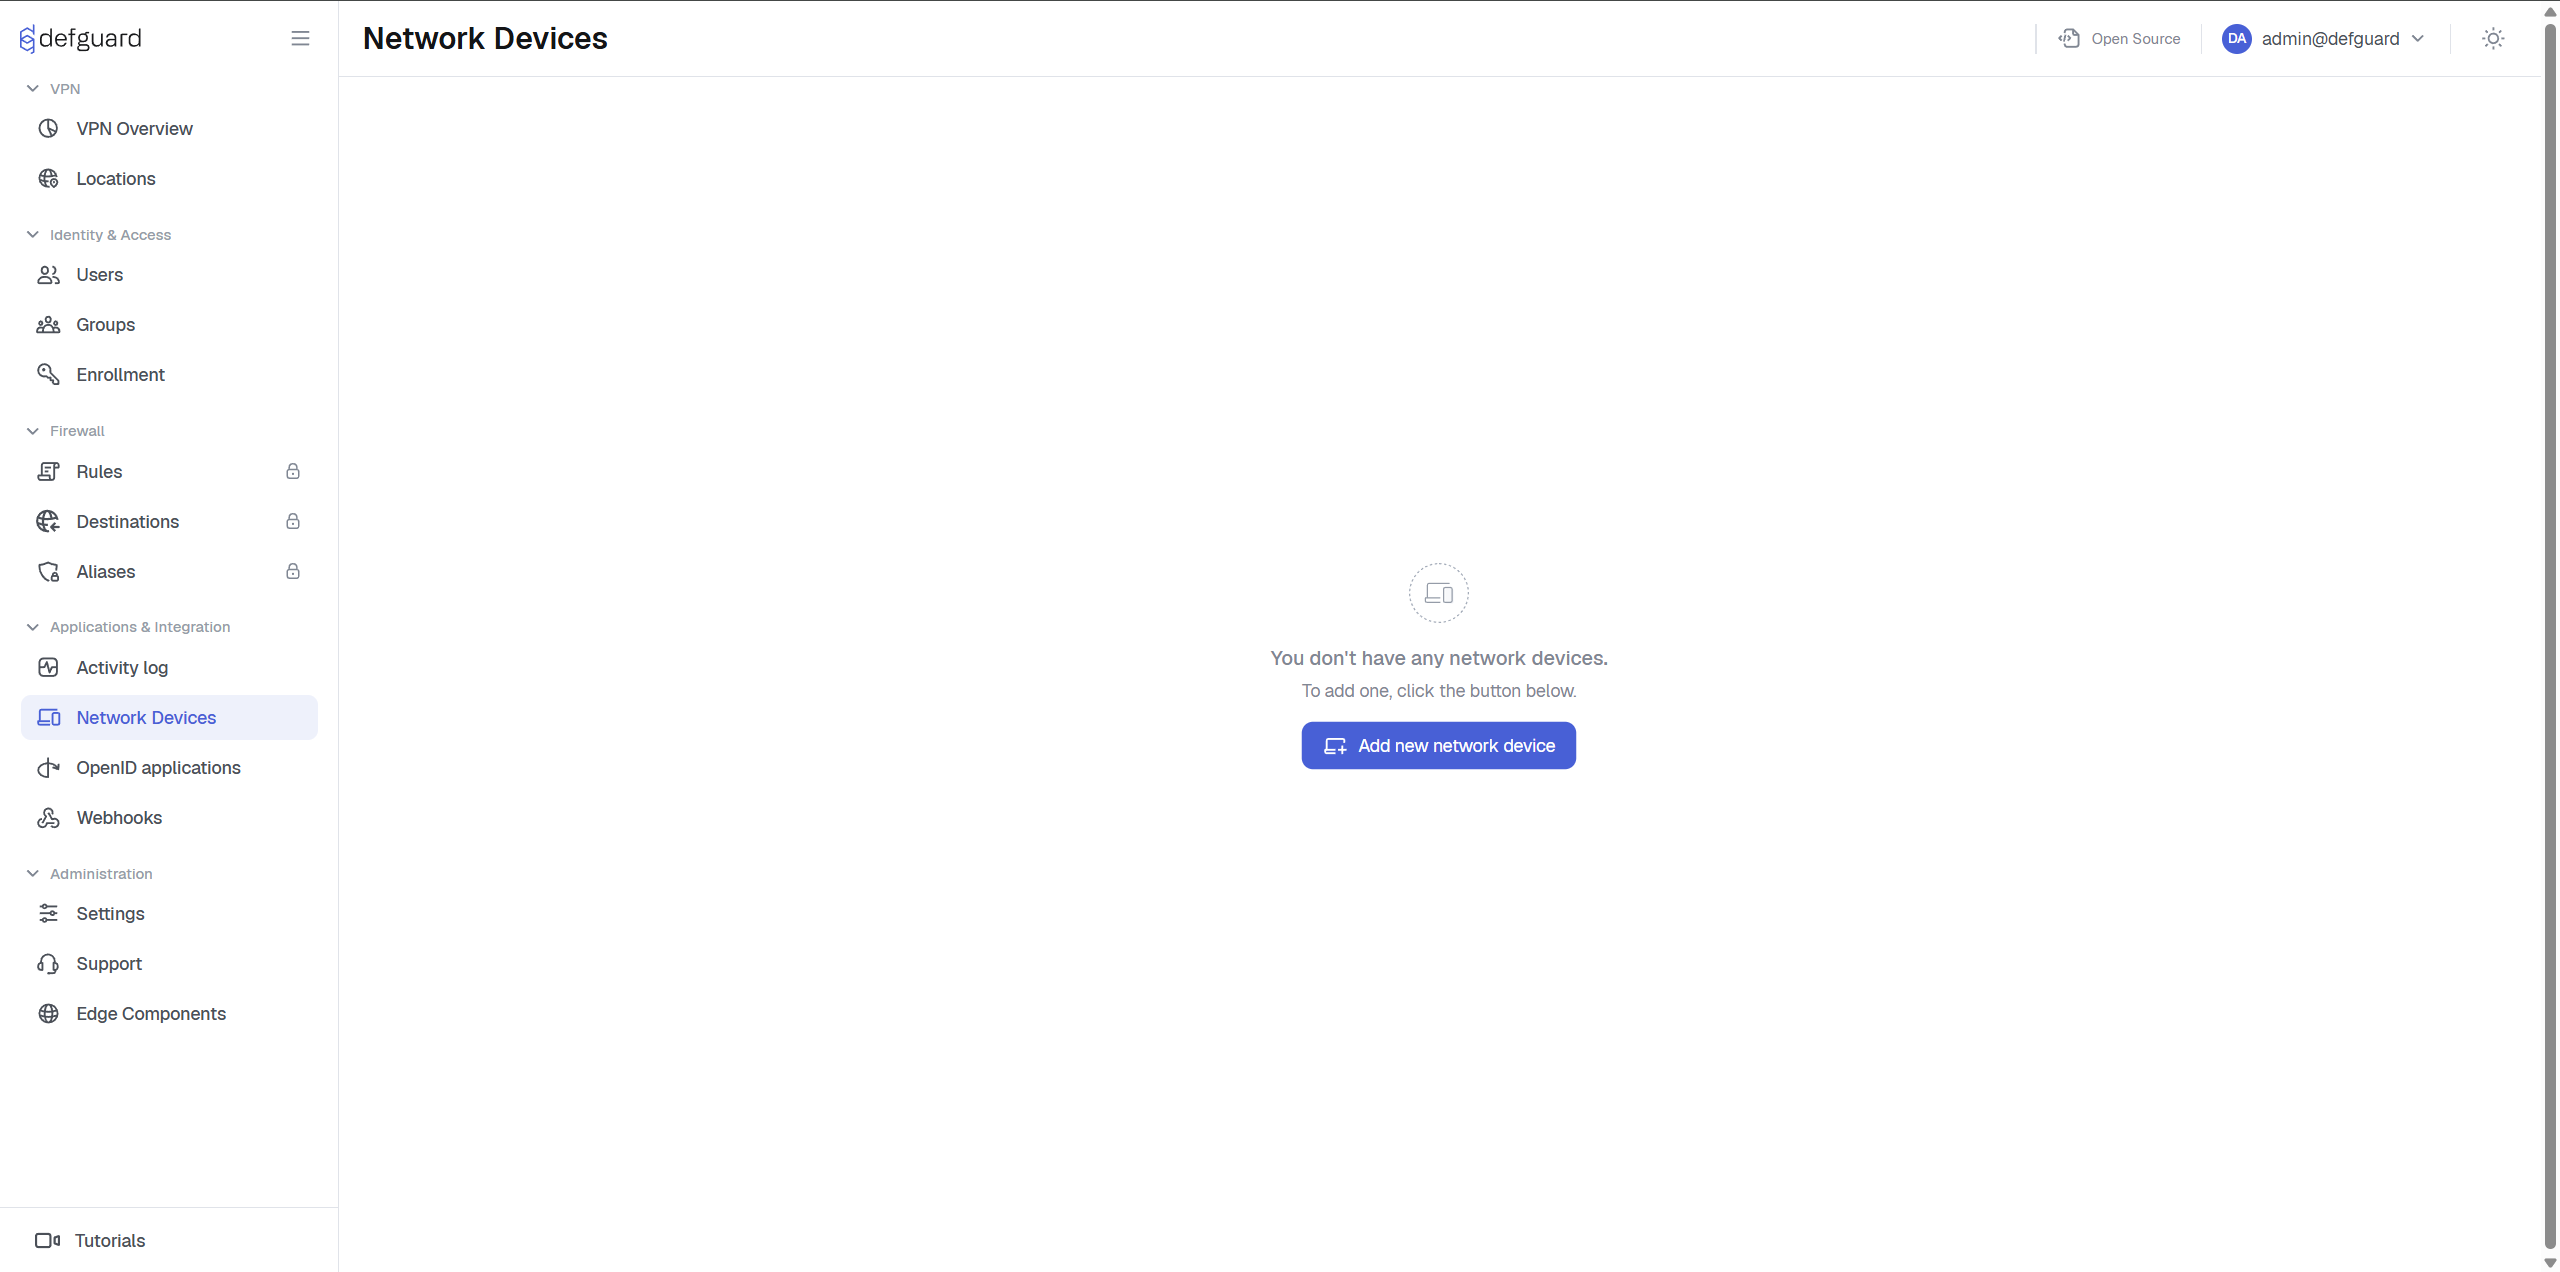
In order to add a new network device, navigate to the network devices menu (select it from the menu bar at the left).
While in the network device menu, click the "Add new network device" button.
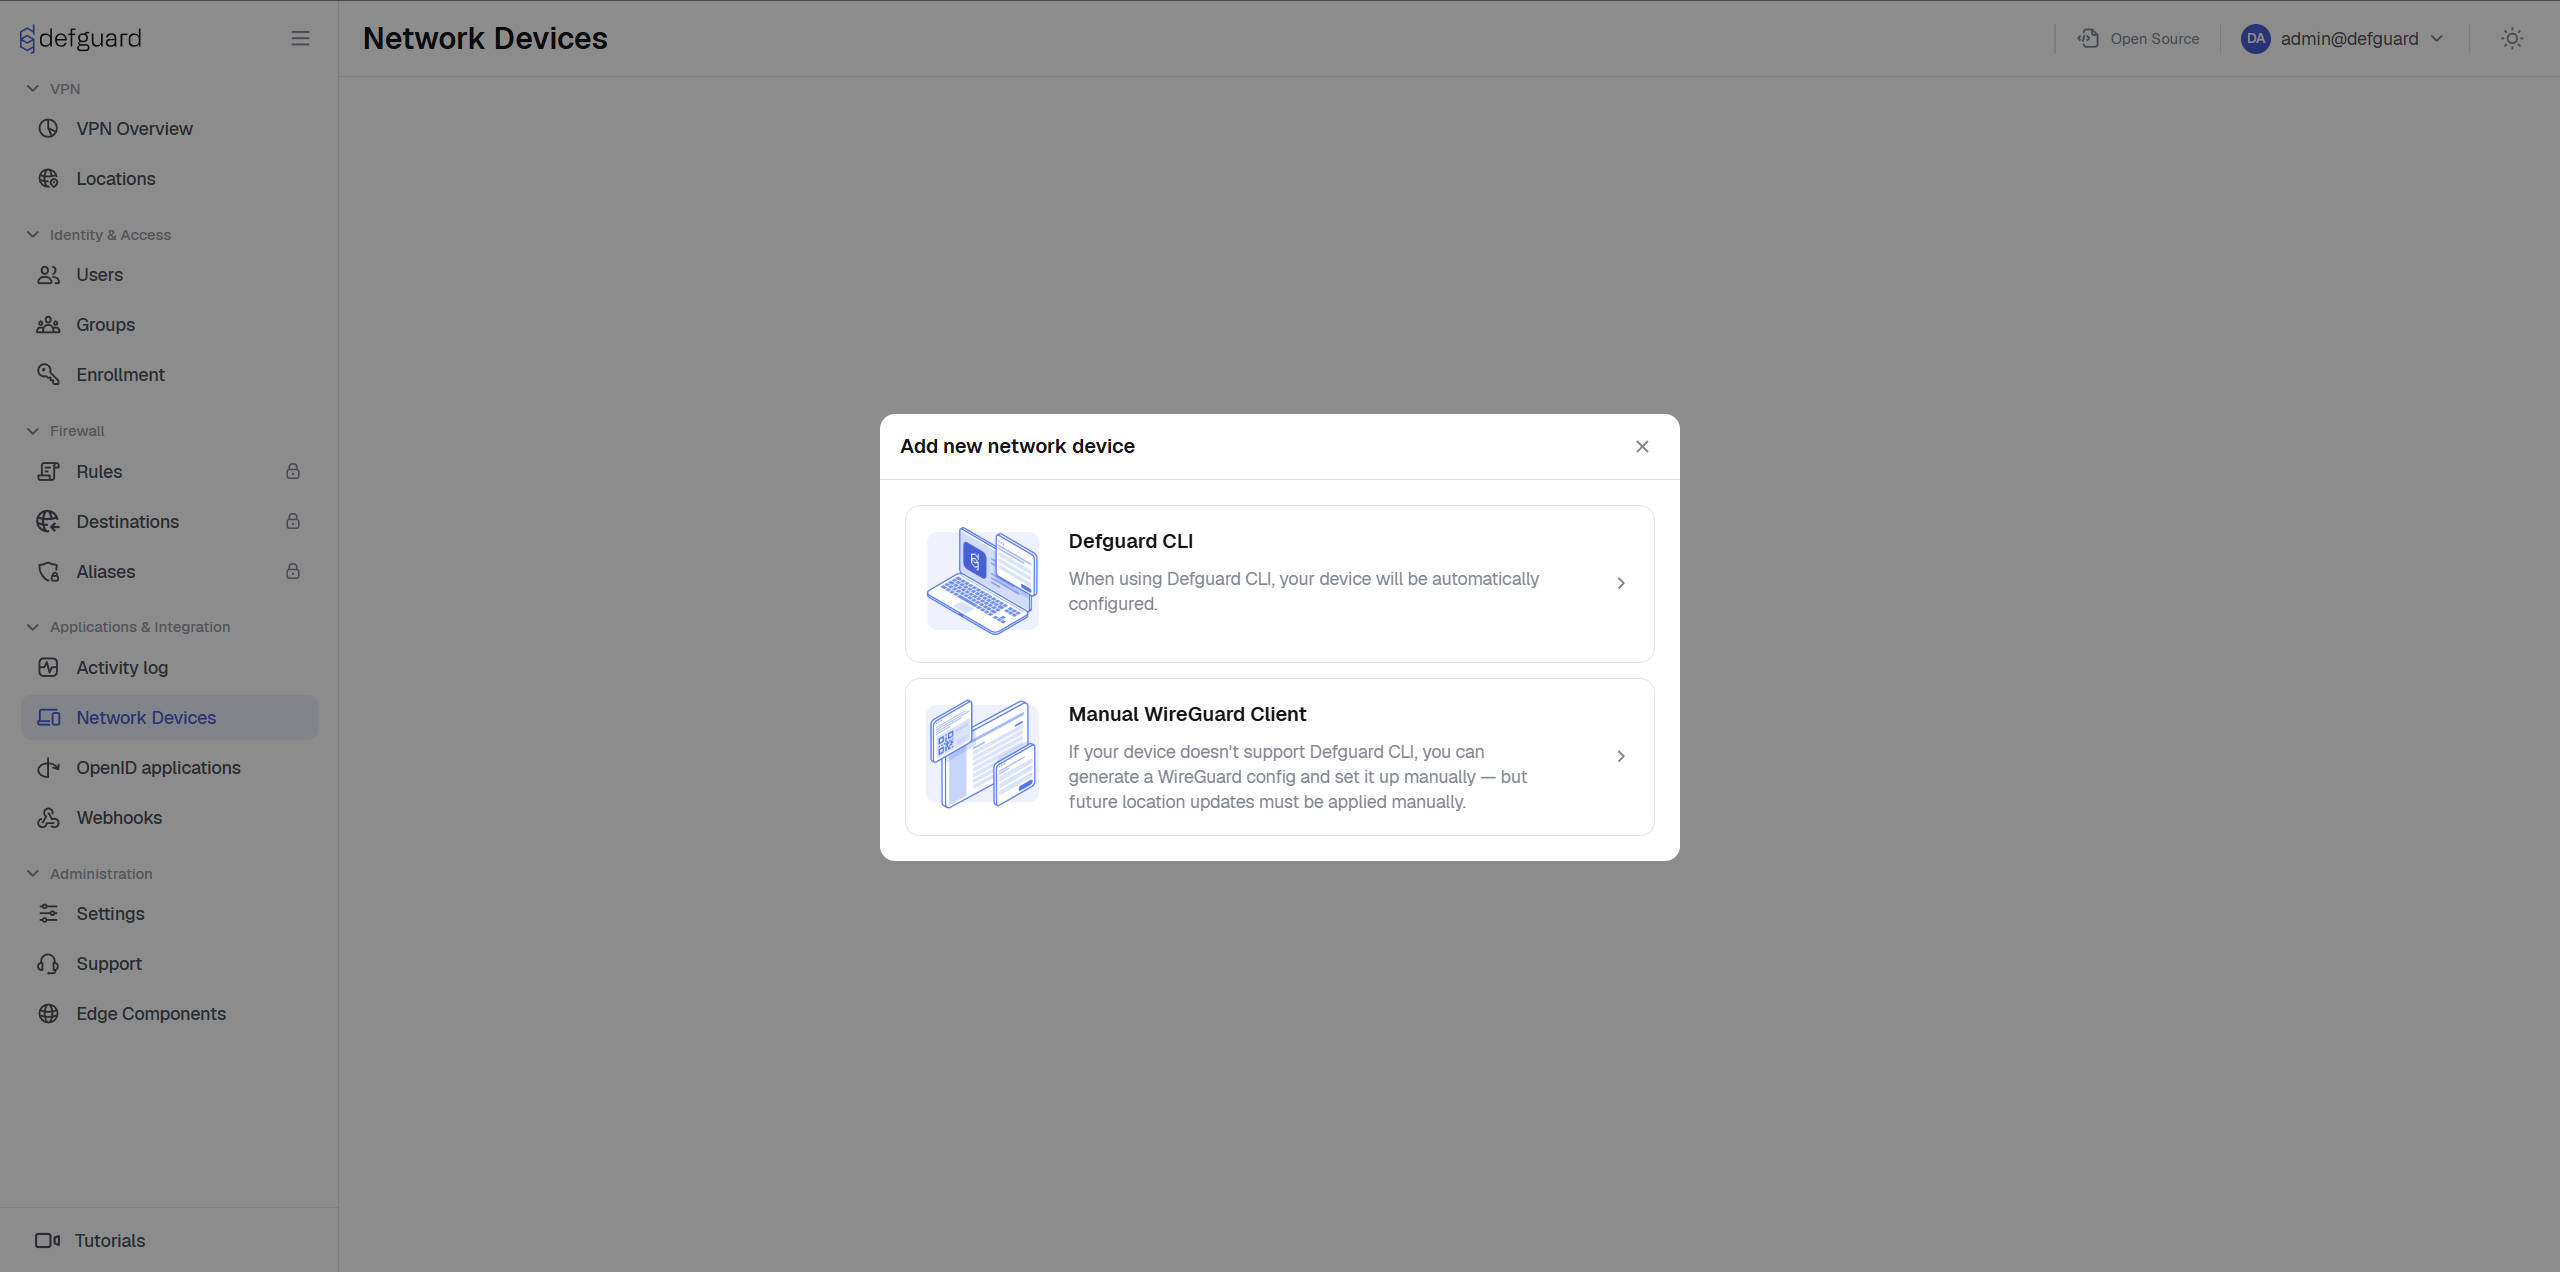
You will be presented with a popup prompting you to select your method of setting up the network device.
* **Defguard Command Line Client -** choose it to automatically configure your device with the [Defguard CLI client](#defguard-cli-installation-and-usage)
* **Manual WireGuard Client** - choose it if you don't want to use the Defguard CLI client. You will need to configure your network device manually with a WireGuard config file.
#### Using the Defguard CLI client
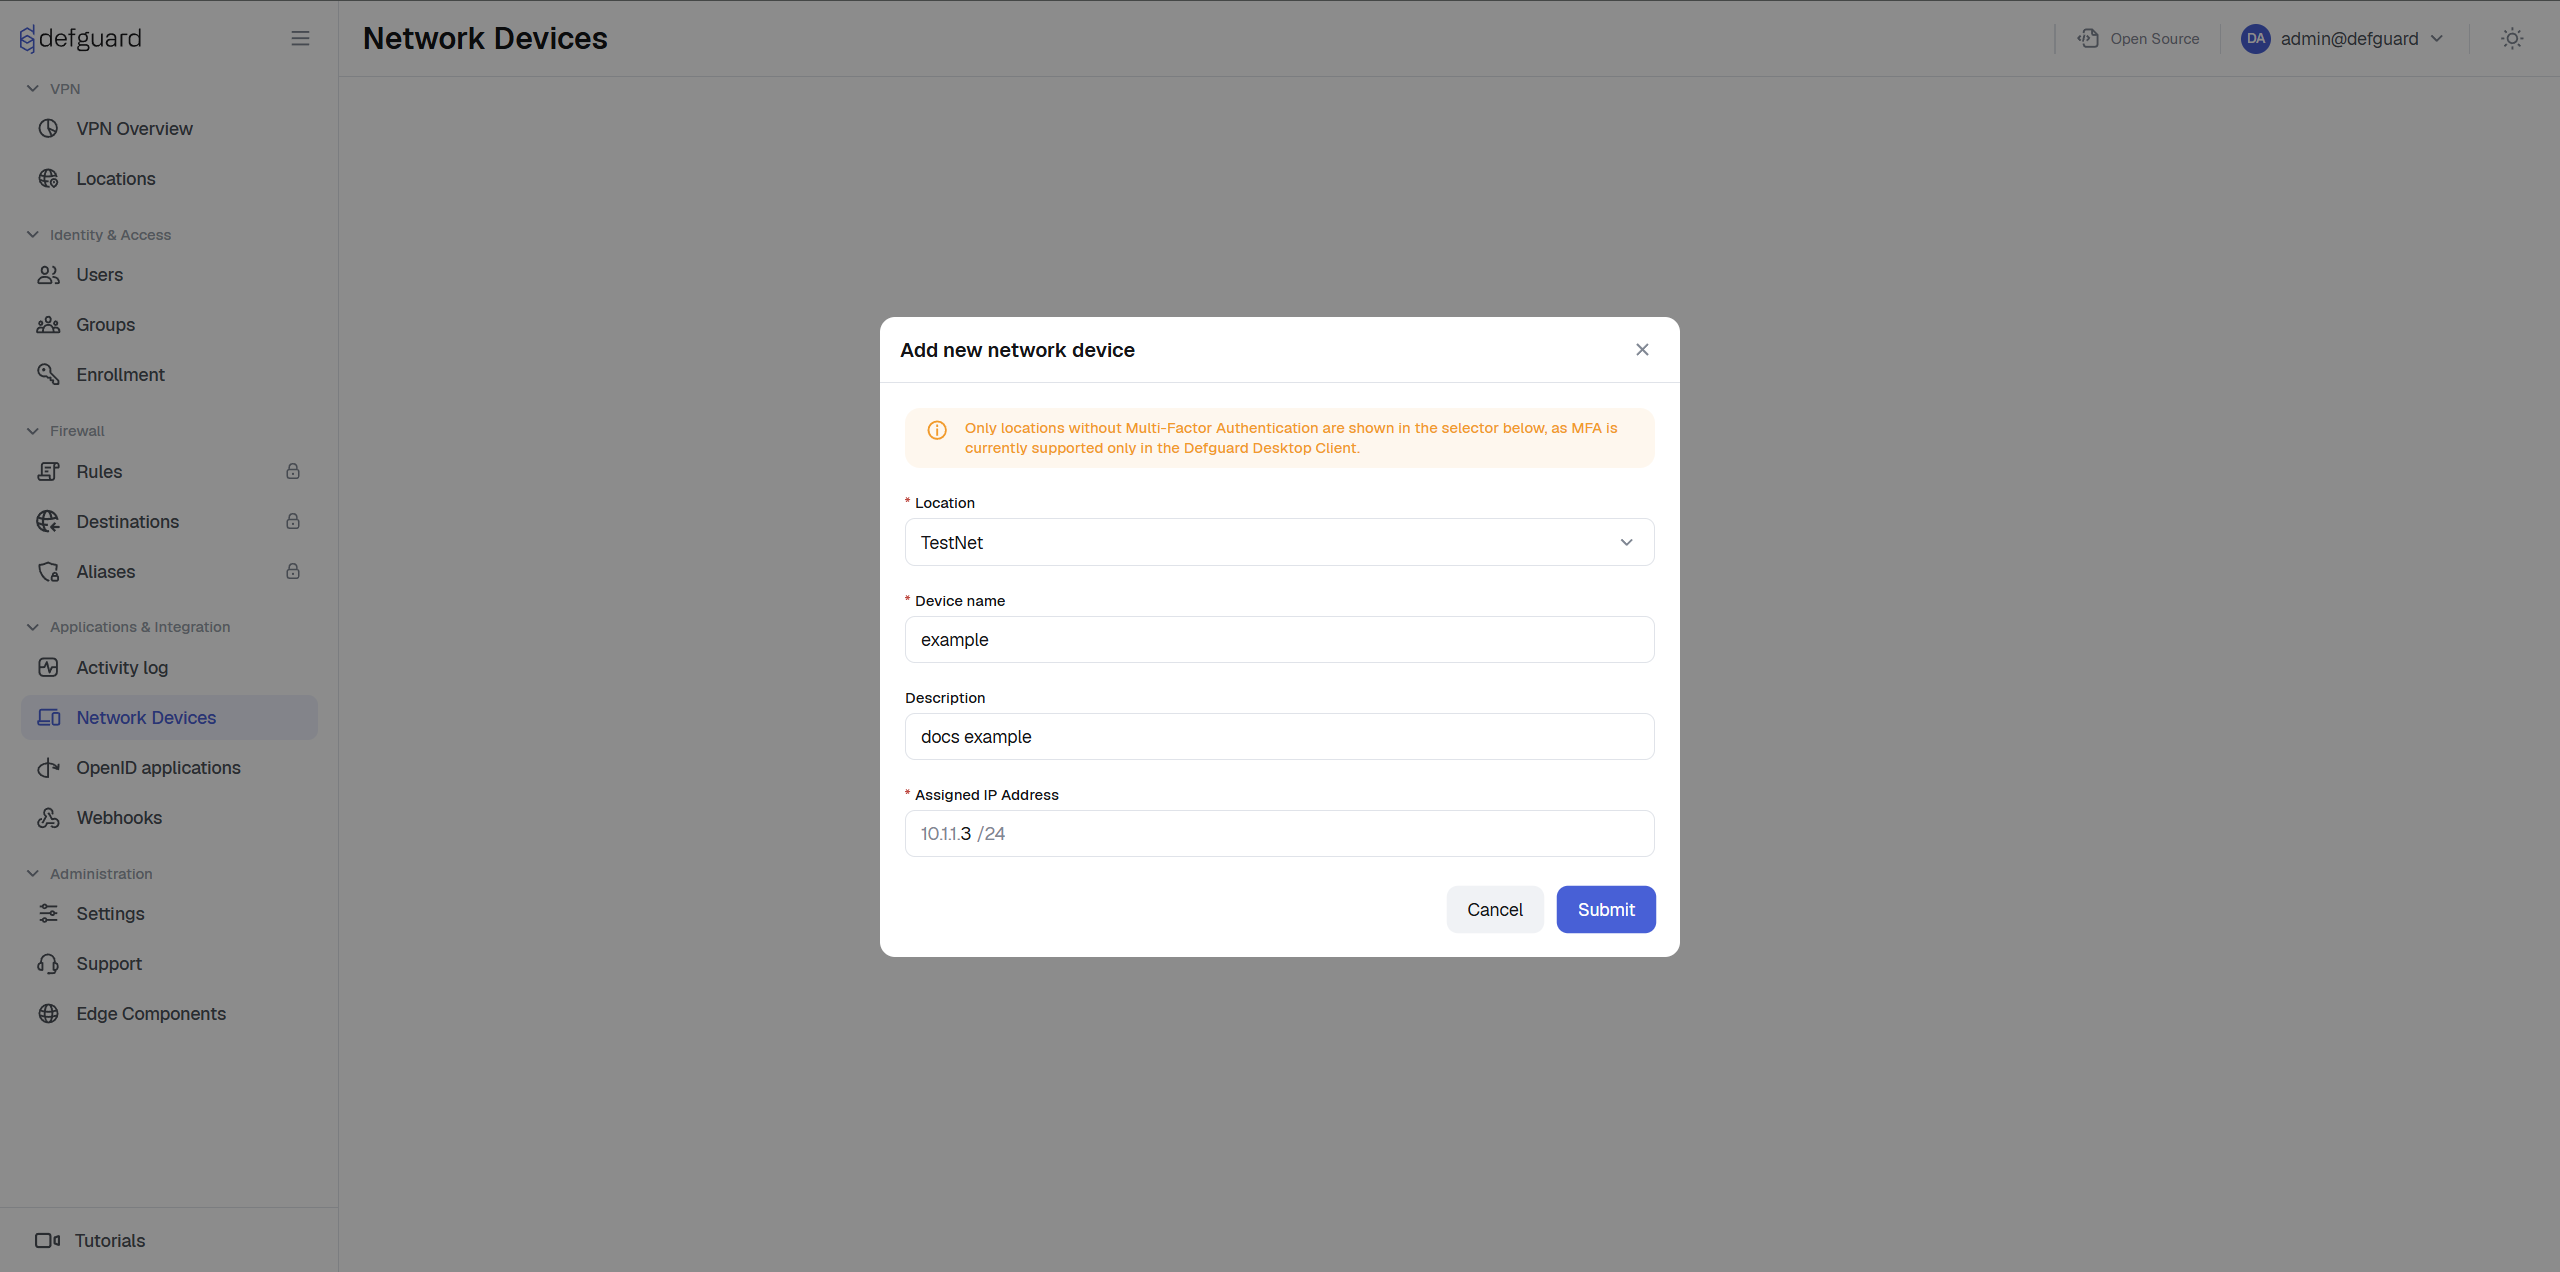
After selecting the first option you will be presented with the initial setup screen.
You can specify here the following settings:
* **Device name** - the name used to identify the device, keep it unique in regard to other network devices. This name will be displayed on the network device list,
* **Location** - the network to which the device should have access,
* **Assigned IP Address** - automatically suggested IP address, you may change it as needed,
* **Description** - the description to help you identify the device, it will be displayed in the device list.
After you've finished setting those values, proceed to the next step. You will be presented with an enrollment command. Learn more about further steps from the [CLI client documentation](#defguard-cli-installation-and-usage).
#### Using the Manual WireGuard client
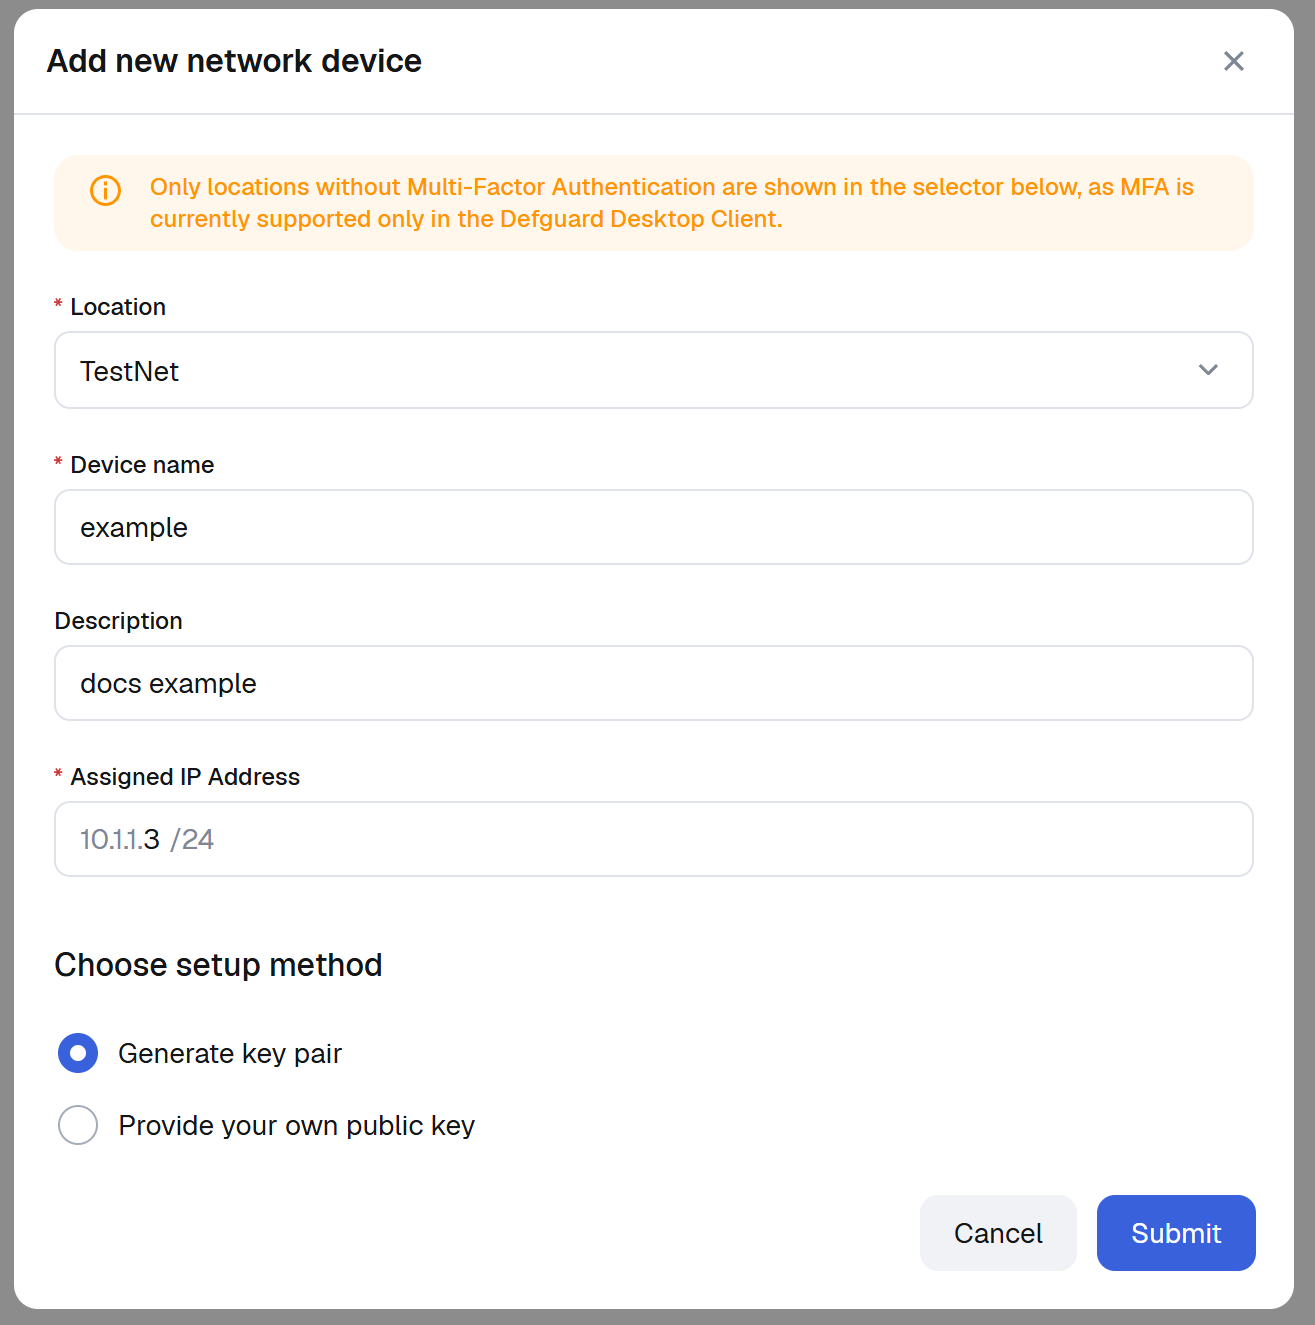
The screen here is similar to that of the CLI client configuration, except for the additional public key field.
The fields are as follows:
* **Device name** - the name used to identify the device, keep it unique in regard to other network devices. This name will be displayed on the network device list,
* **Location** - the network to which the device should have access,
* **Assigned IP Address** - automatically suggested IP address, you may change it as needed,
* **Description** - the description to help you identify the device, it will be displayed in the device list.
If you already have a public key for your device, insert it into the public key field. Otherwise, select the option to generate the key pair.
On the next screen you will be presented with the WireGuard configuration file. Copy, download or scan it to import it to your WireGuard client.
## Displaying network device configuration and enrollment token
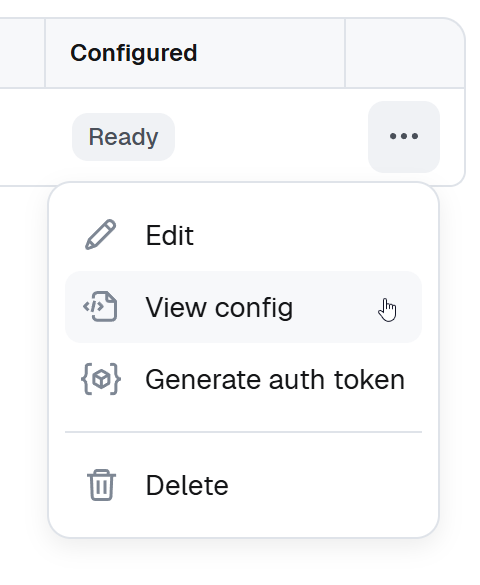
After you've configured your network device, you can display its enrollment token again, by interacting with the following menu:
* Selecting "Generate auth token" will re-generate the enrollment token and will allow you to enroll your CLI client again. Use it if you want to manually pull the newest network configuration for your client.
* Selecting the "View config" option will display the WireGuard configuration file (without the private key, as Defguard doesn't store it).
## Defguard CLI installation and usage
### Downloading
Download the packages from the [latest release](https://github.com/DefGuard/client/releases/latest) page. The CLI Client ships as its own set of `dg-*` assets, next to the desktop client packages:
#### Linux (AMD64)
* Deb: `dg-linux-x86_64-v{x.x.x}.deb`
* RPM: `dg-linux-x86_64-v{x.x.x}.rpm`, or `dg-linux-x86_64-v{x.x.x}-el9.rpm` for Enterprise Linux 9
* Binary: `dg-linux-x86_64-v{x.x.x}.tar.gz`
* Deb for Ubuntu 22.04 / Debian 12: `dg-linux-{x.x.x}_amd64_ubuntu-22-04-lts.deb`
#### Linux (ARM64)
* Deb: `dg-linux-aarch64-v{x.x.x}.deb`
* RPM: `dg-linux-aarch64-v{x.x.x}.rpm`
* Binary: `dg-linux-aarch64-v{x.x.x}.tar.gz`
* Deb for Ubuntu 22.04 / Debian 12: `dg-linux-{x.x.x}_arm64_ubuntu-22-04-lts.deb`
### Requirements
* Root access on a given machine
* Defguard Edge running and accessible from the machine the CLI will be installed on
* `resolvconf` and `ip` commands available
### Installation
Installation is straightforward. As a root, install it as any other package of a given type (deb/rpm).
#### Deb archive
```sh
apt install ./dg-linux-x86_64-v{x.x.x}.deb
```
#### DNF
```sh
dnf install ./dg-linux-x86_64-v{x.x.x}.rpm
```
#### Post install
After installing the CLI, you should gain access to the `dg` command and a new `dg` service should've been created. You can interact with the client using the `dg` command alone or use the service to run it in background. You can test if the installation succeeded by trying to print the command's help:
```sh
dg --help
```
### Usage
#### Defguard Core setup
Defguard CLI works only with [network devices](/2.2/features/network-devices.md), so to use it, you will need to first add a new network device. Refer to the network device documentation to learn more.
After you've configured your network device on Defguard core, you will be presented with the following command:
```sh
dg enroll -u -t
```
Copy the command and proceed with [enrollment](#enrollment).
**Important**: The machine on which the `dg` command is executed must have its clock set to current date and time (possibly using Network Time Protocol). This is required to store web cookies correctly.
#### Enrollment
Execute the command obtained in the previous step to configure Defguard CLI on the machine of your choice. The enrollment command will pull all the information required to establish a connection from your Defguard instance (through Defguard Edge, so make sure it can be accessed) and will save it in a configuration file. Run the `enroll` command only when you need to retrieve your network configuration and apply it to the CLI Client. If you have access to the enterprise features, the CLI should automatically handle this when running.
#### Connecting
After completing the enrollment, you can connect to the given network by running the following command as root:
```sh
dg
```
After executing the command you should see a message stating that you have been connected to your network of choice.
#### Automatic config fetching (polling)
If you have access to the enterprise features, CLI will periodically fetch the latest network config and apply it if it has changed. This is useful because when you edit your network configuration in Defguard core, you won't have to manually re-configure every network device.
#### Running in the background (service)
After installing the CLI, a systemd service will be automatically setup. The service won't be running at first as the manual [enrollment](#enrollment) is needed beforehand. After you've completed the enrollment, you can start the service, e.g. by doing:
```sh
systemctl start dg
```
You can configure the service and set the log verbosity by editing `/etc/defguard/dg.conf`.
#### Specifying a custom configuration path
You can use a custom config path to save your network configuration by providing it as a command argument:
```
dg --config ./config.json enroll -u -t
```
And then to connect:
```
dg --config ./config.json
```
### Debugging and troubleshooting
It may be easier to identify a problem by passing one of the following flags, which control the logging verbosity level:
```sh
--debug
--verbose
```
Those flags can be passed to any command to display more detailed information about the given process.
#### Common issues and messages
```
Specified IFLA_INET6_STATS NLA attribute holds more(most likely new kernel) data which is unknown to netlink-packet-route crate
```
This shouldn't affect anything and can be ignored in most cases.