> For the complete documentation index, see [llms.txt](https://docs.defguard.net/llms.txt). Markdown versions of documentation pages are available by appending `.md` to page URLs; this page is available as [Markdown](https://docs.defguard.net/1.6/using-defguard-for-end-users/mobile-client/instance-adding.md).
# Adding new Instance
In this guide, you will learn how to add Instance in mobile app.
If you are after the enrollment process, please follow [this guide](#adding-instance-in-defguard)
## Enrollment via external SSO
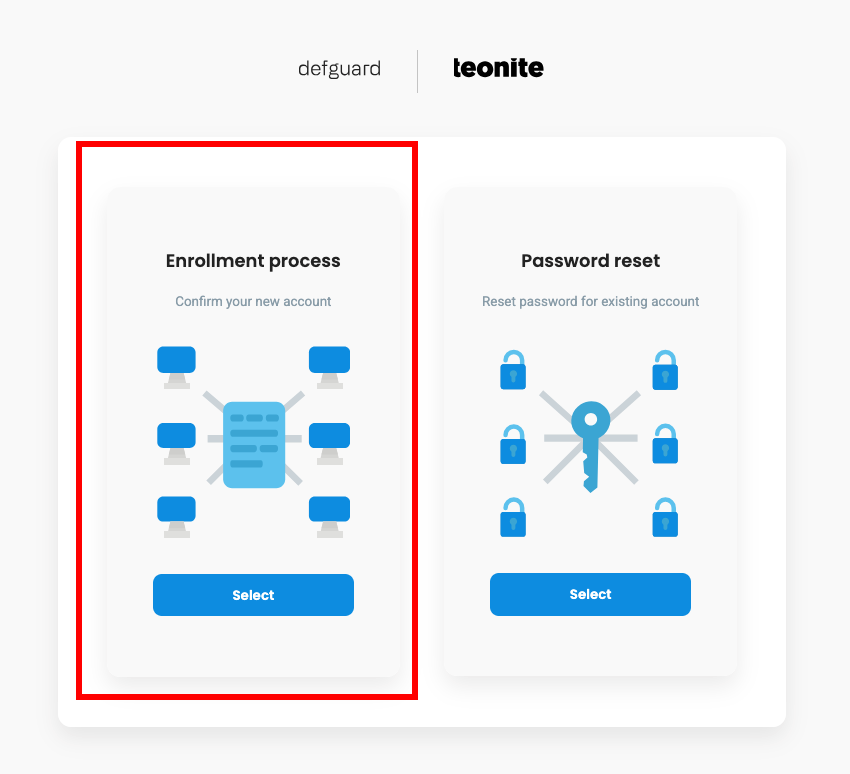
1. Go to your enrollment page. Click **Select** under "Enrollment process".
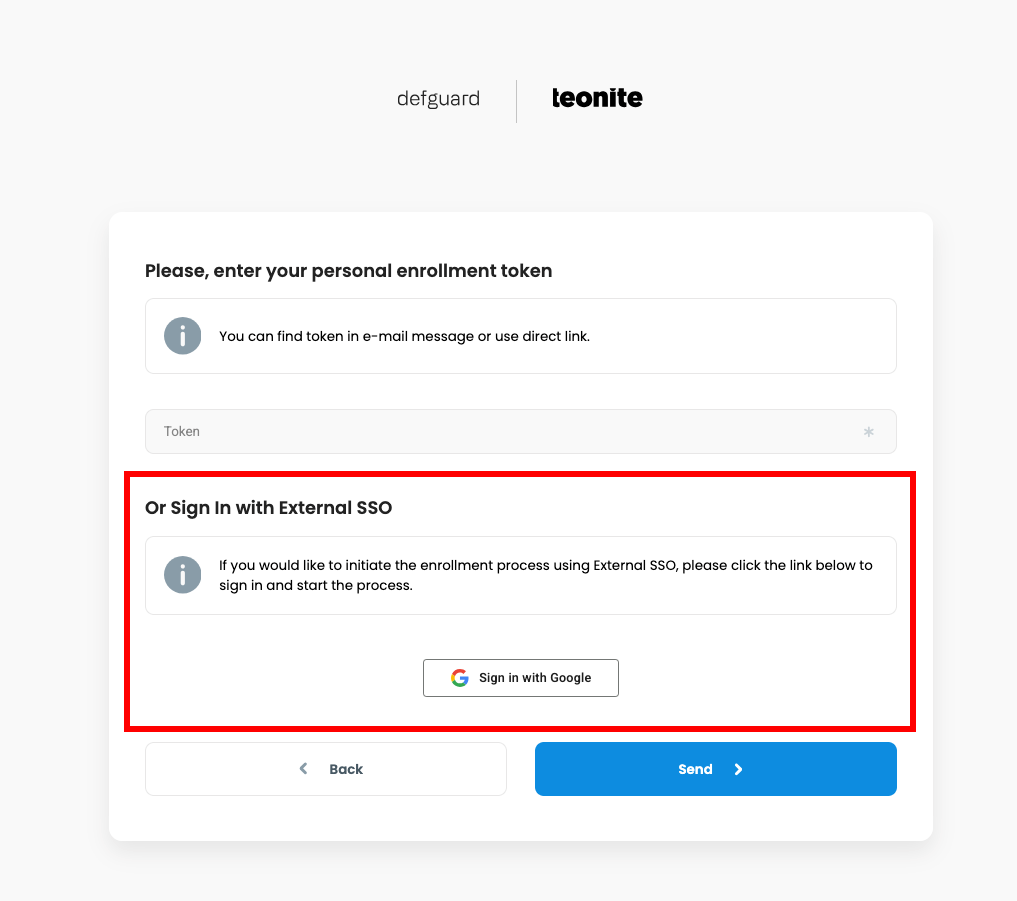
2. In this example we use Google as OIDC provider so our button is "Sign in with Google". Your organization can use different OIDC provider.
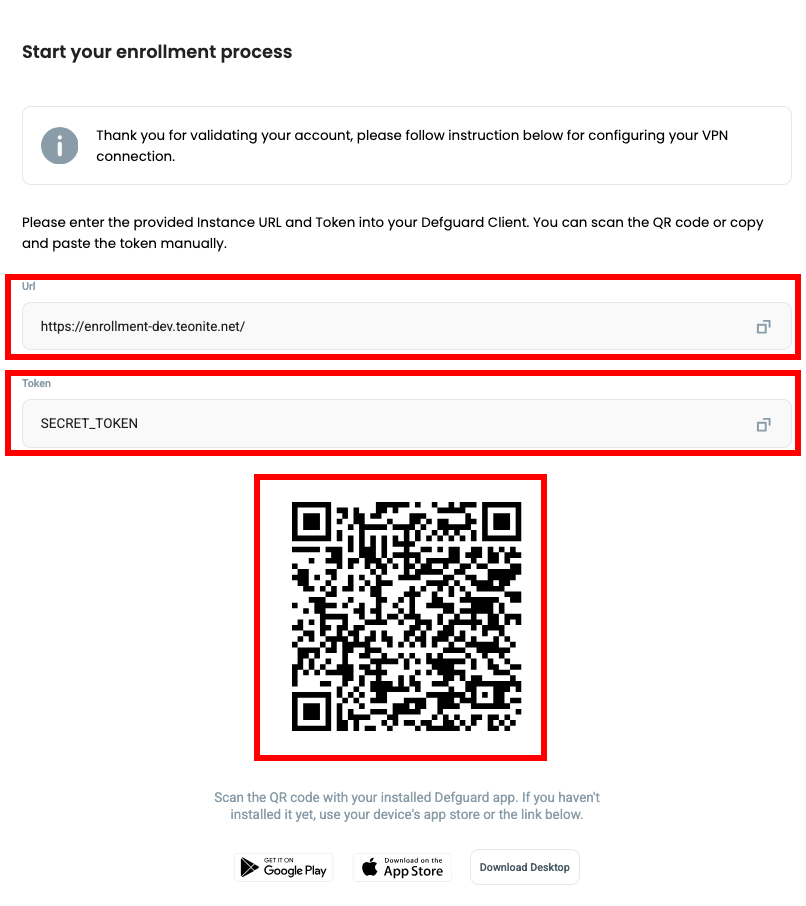
3. You will be redirected to your OIDC provider login page, please log in. After doing this, you will be redirected and shown a screen with **URL, Token and QR Code**.
4. Open Defguard Mobile on your smartphone
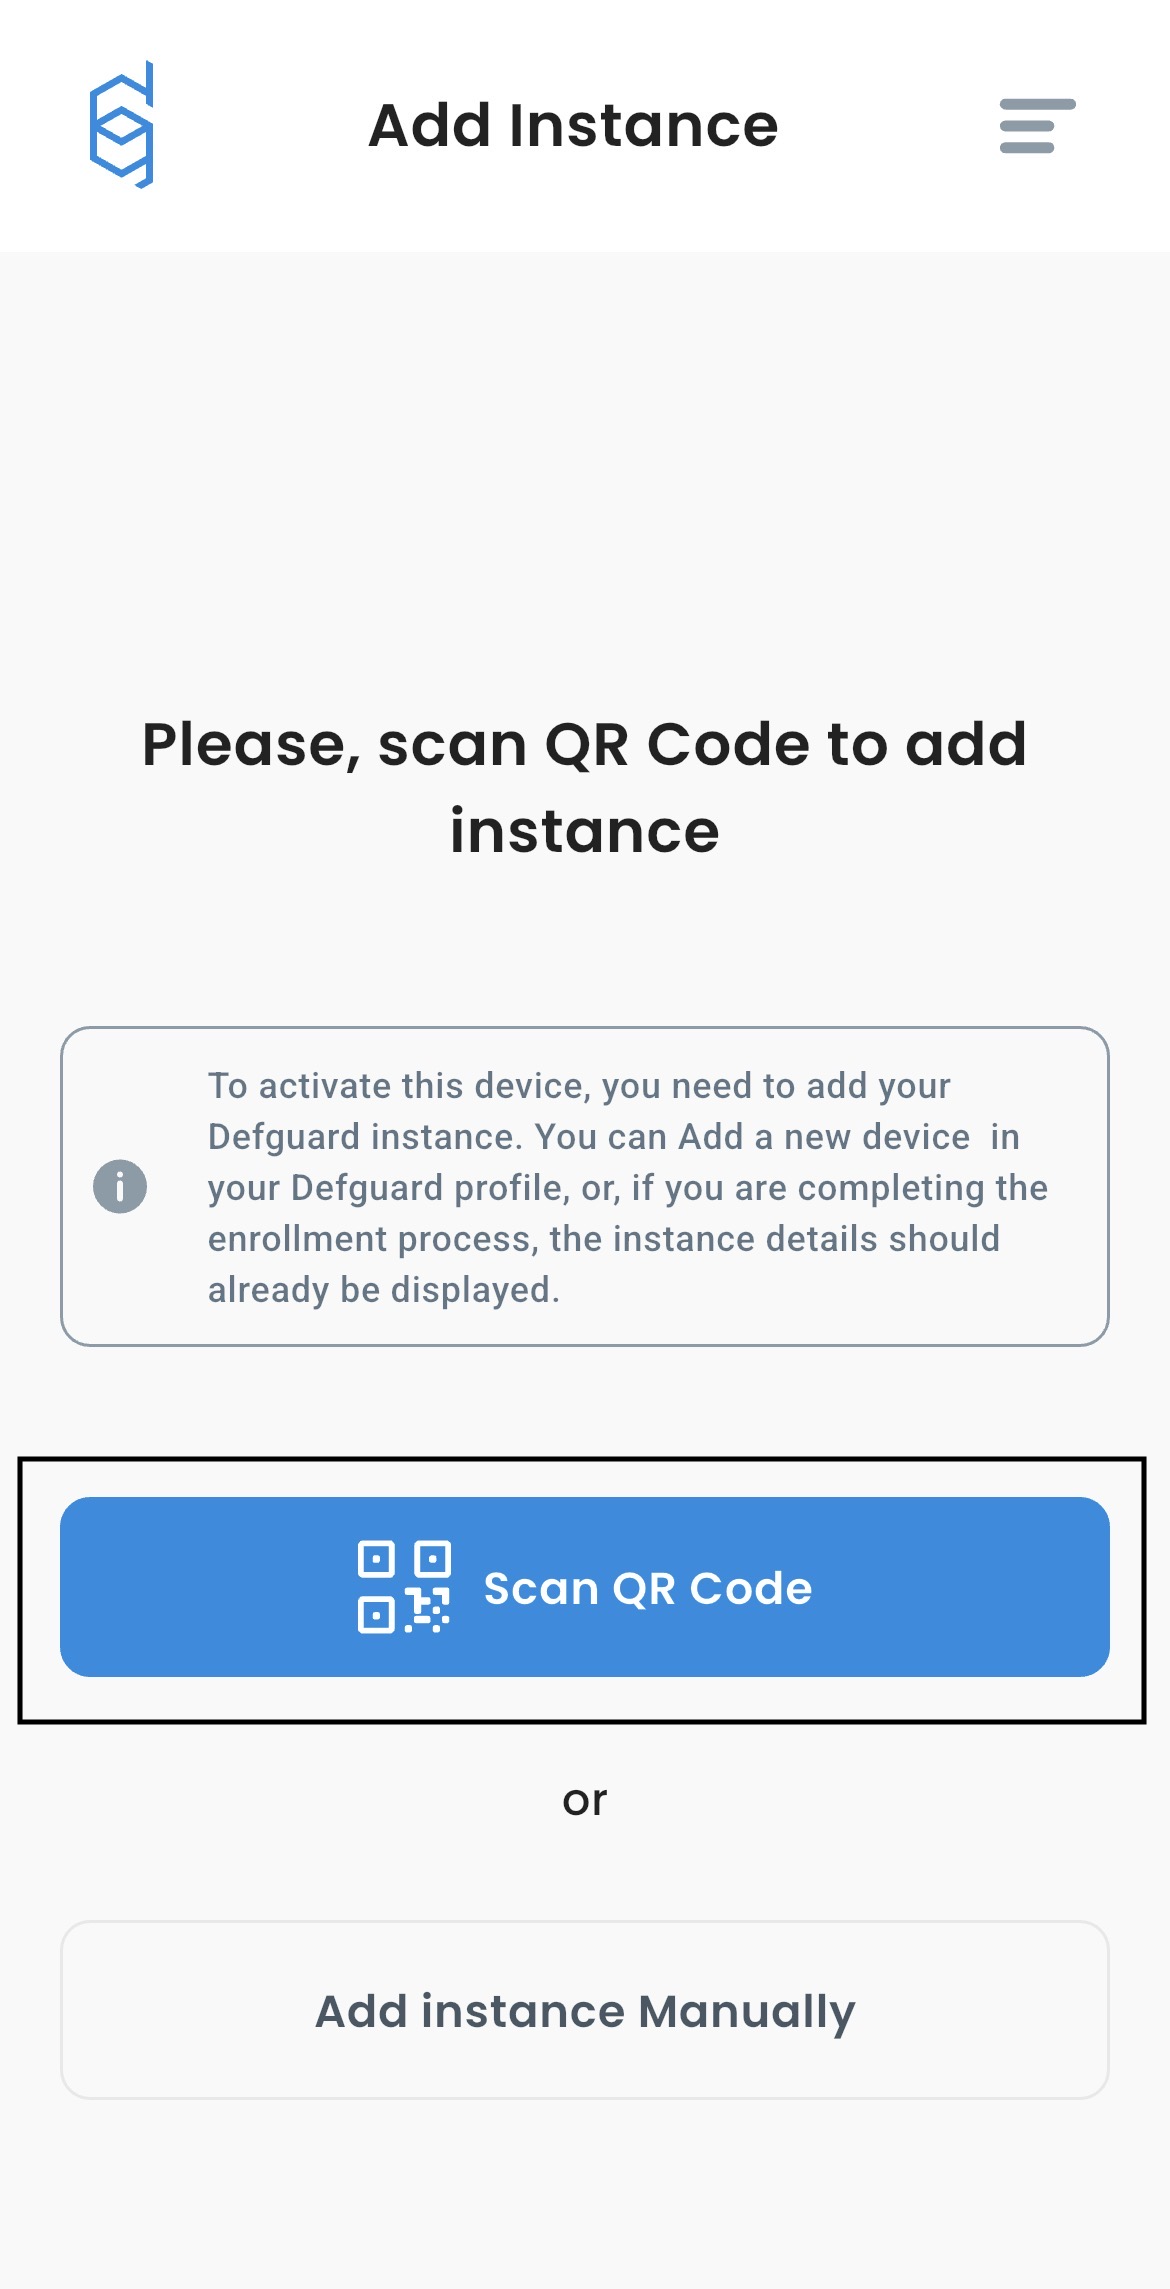
5. Click **Scan QR Code**
6. Scan QR generated in step 3.
7. Enter the name of your device. For example "iPhone 11"
8. Confirm
{% hint style="info" %}
If you can't scan QR Code, select **Add Instance Manually** in **step 5** and enter URL and Token from **step 3**.
{% endhint %}
## Enrollment via Email
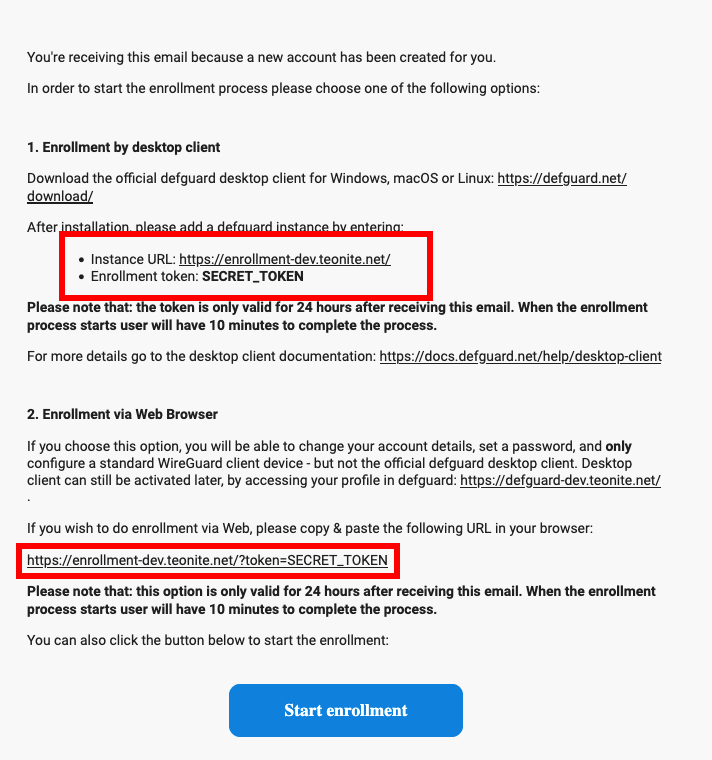
Find enrollment **Instance URL** and **Token** in your "Defguard user enrollment" email. It should look like this:
If you want to enroll via Web Browser, click **Start enrollment** or:
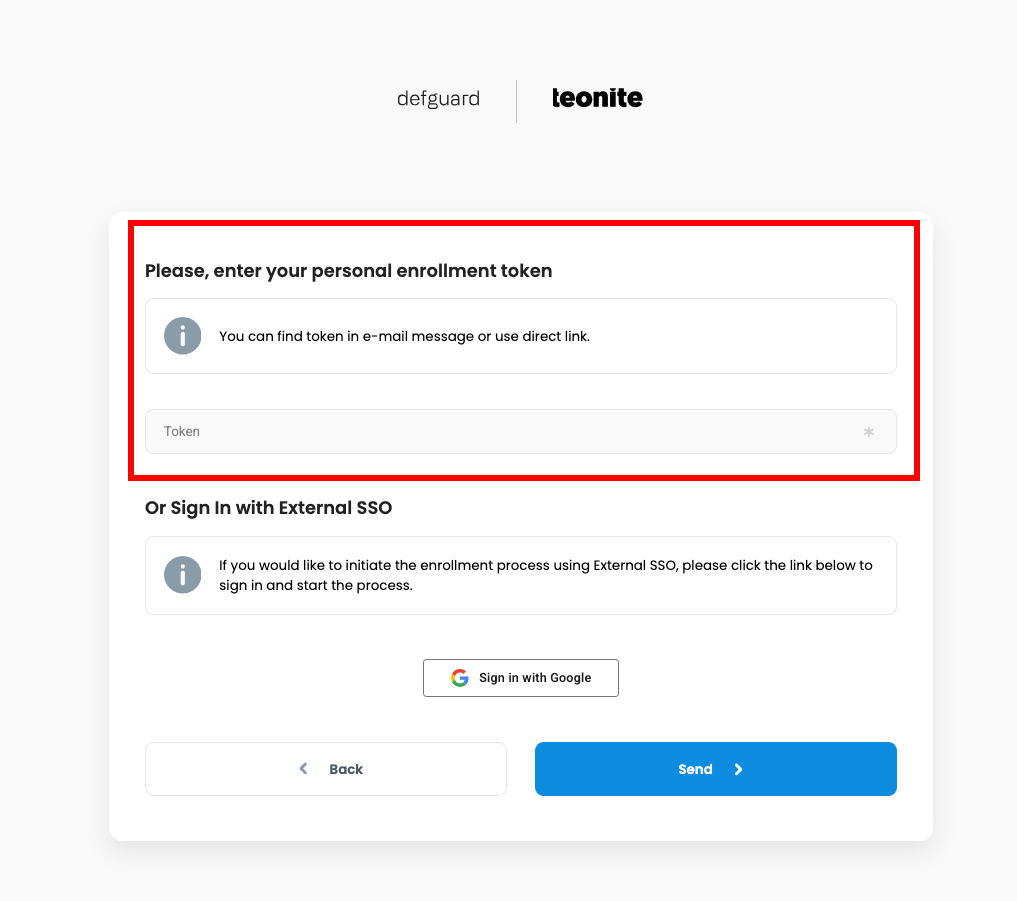
1. Go to your enrollment page. Click **Select** under "Enrollment process".
2. Enter your **Token** and click **Send**.
Now, follow [Enrollment via Web Browser](#enrollment-via-web-browser) guide.
## Enrollment via Web Browser
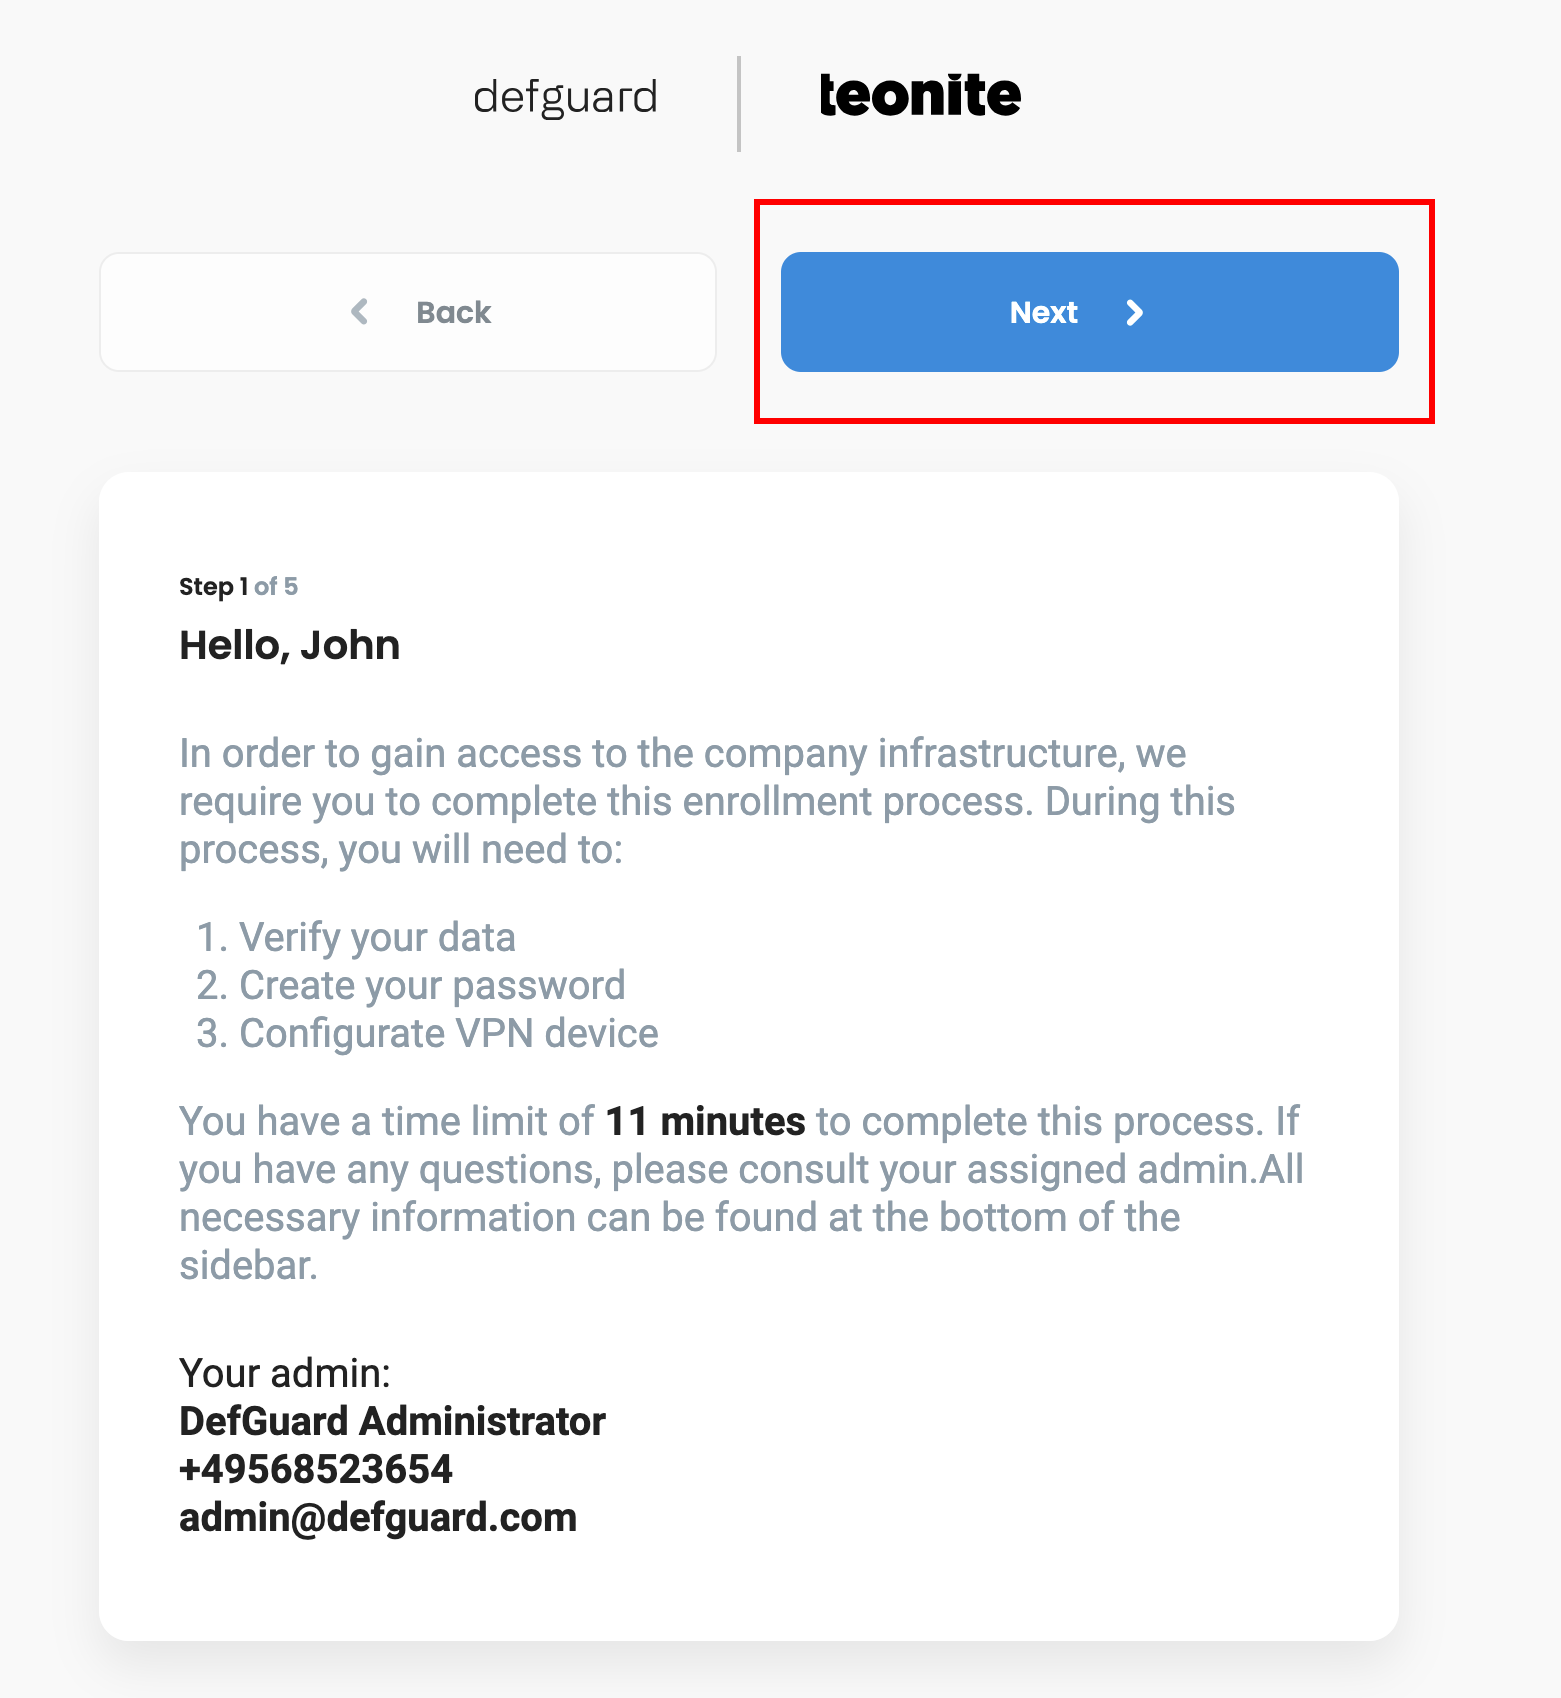
1. Upon starting enrollment process you will see something like this: **Before proceeding, read the text carefully, as it may contain important information given by your administrator,** then click **Next**.
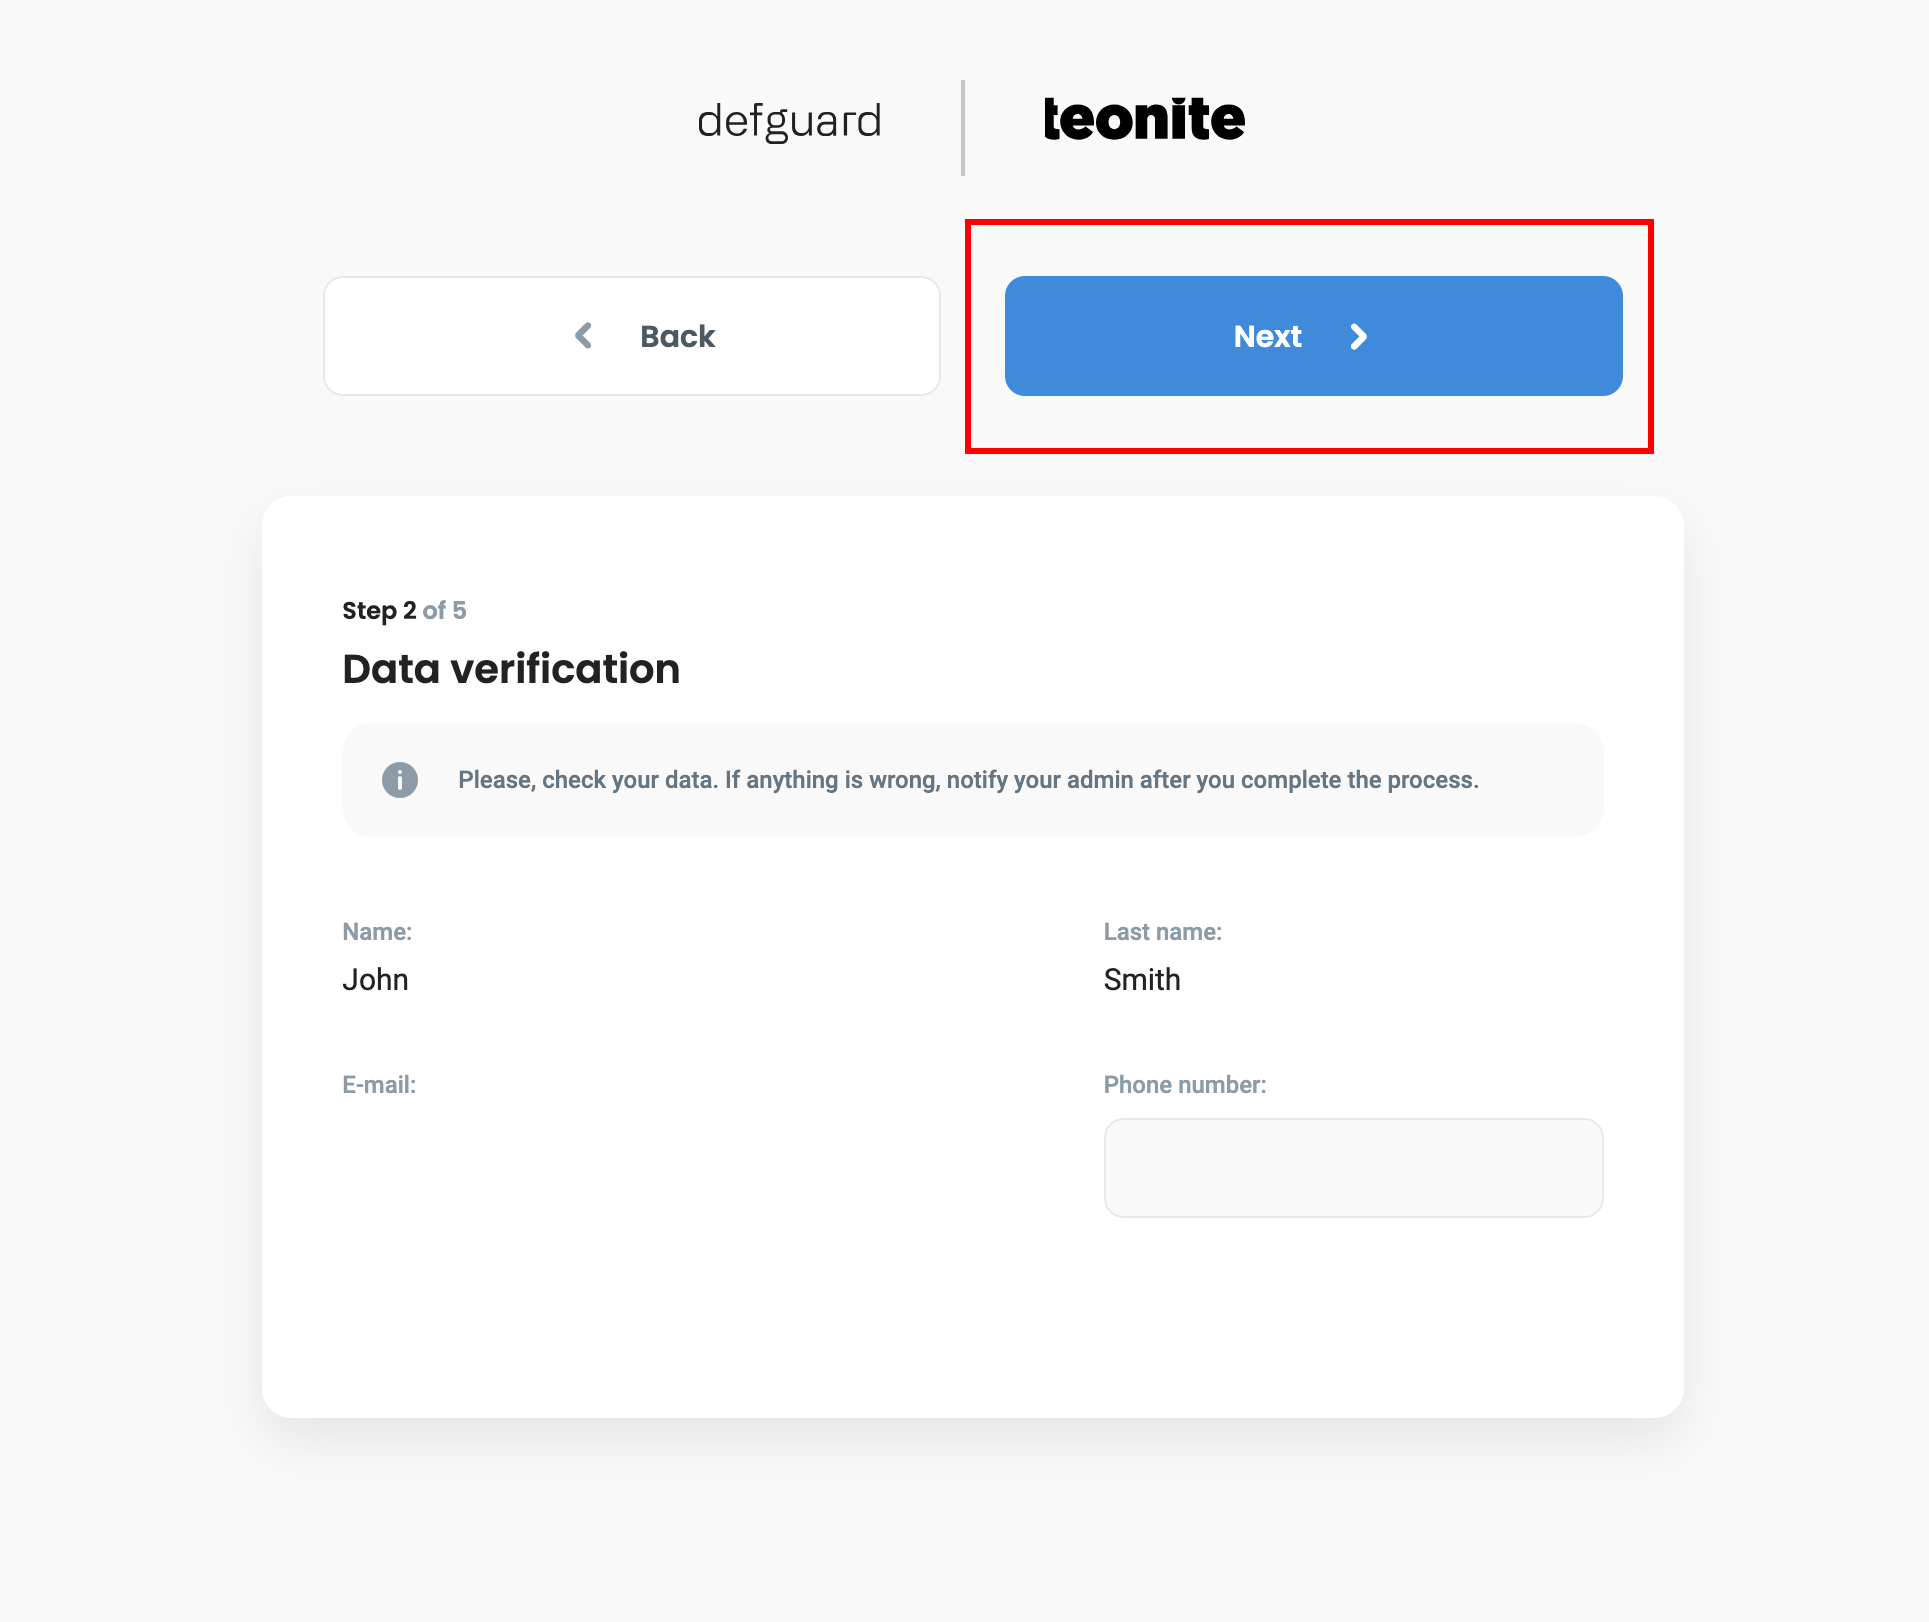
2. In this step you can optionally enter your phone number after entering it. Proceed by clicking the **Next** button.
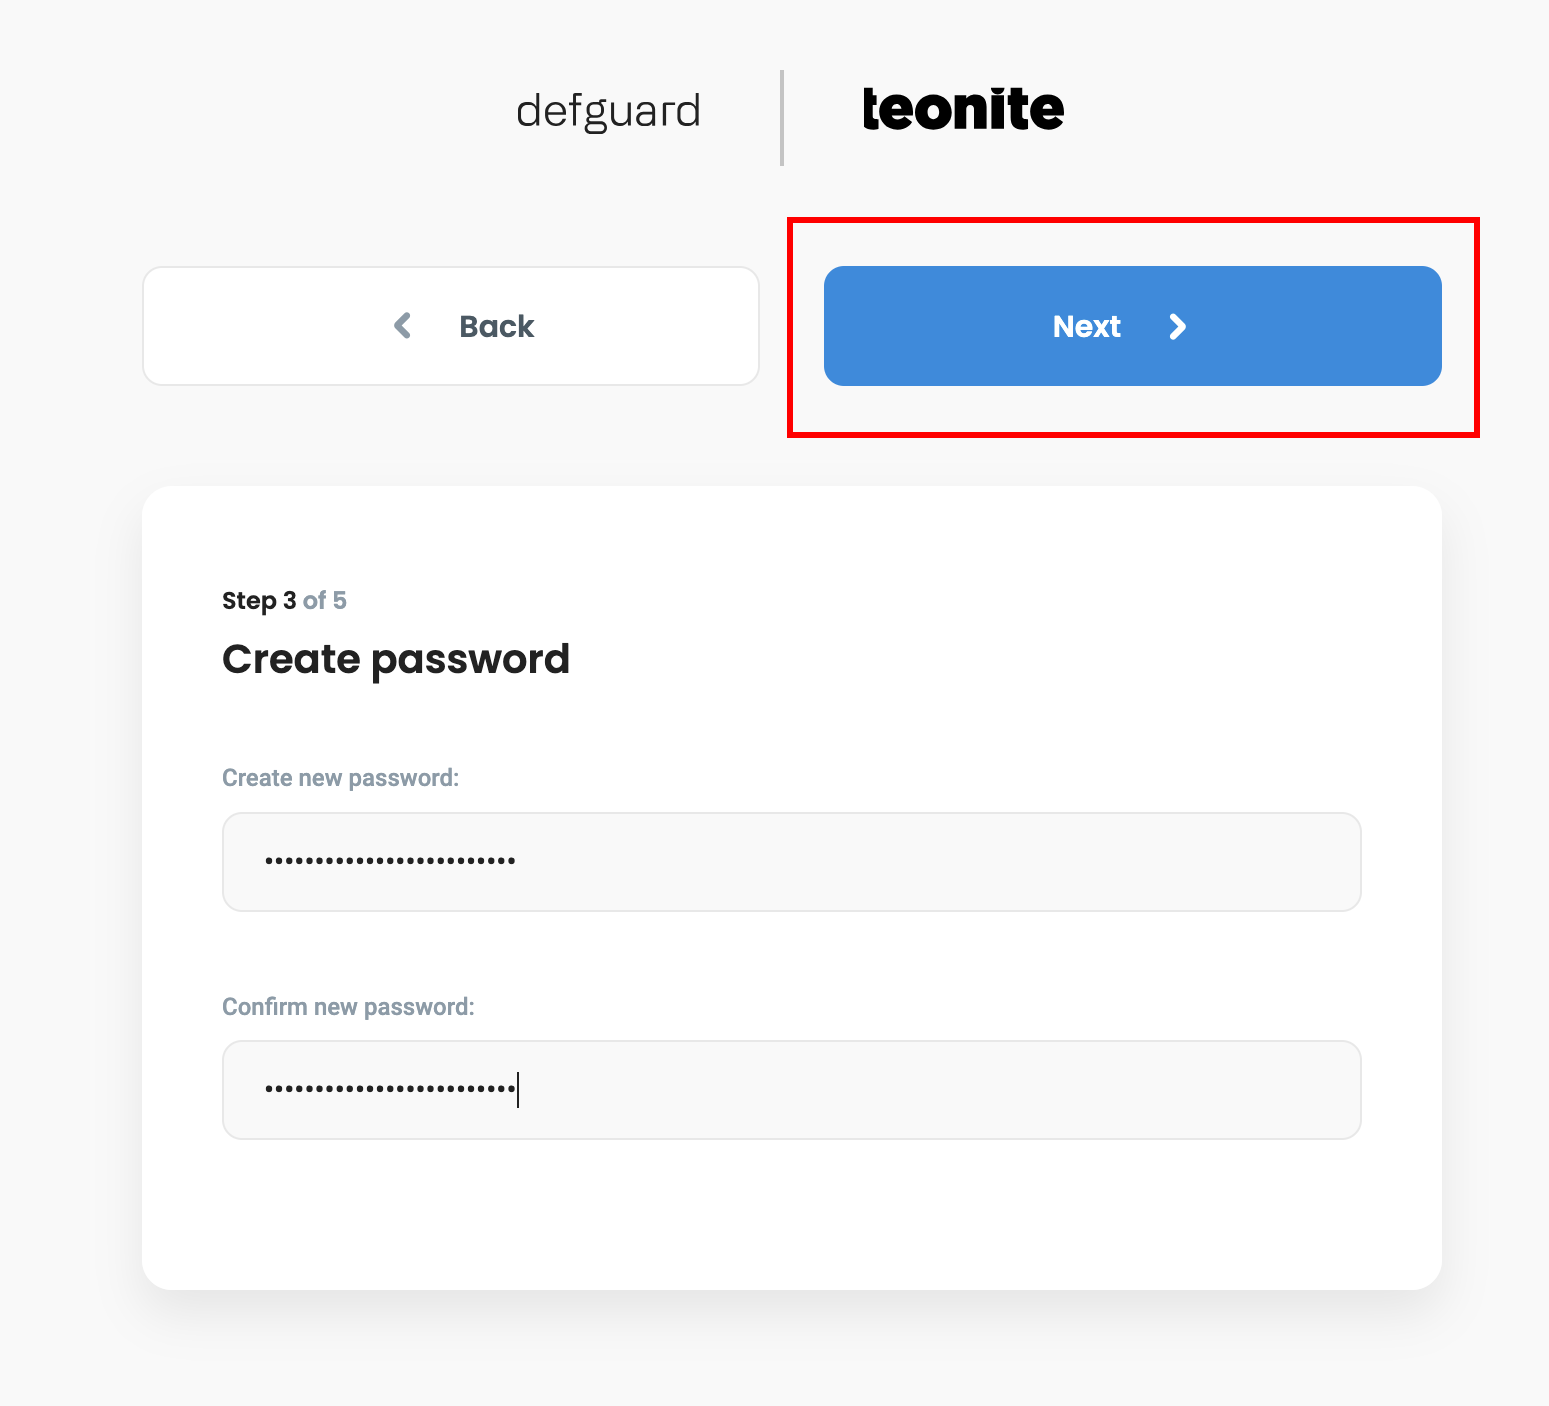
3. Now, you need to set up your password. After entering the password, proceed by clicking **Next**.
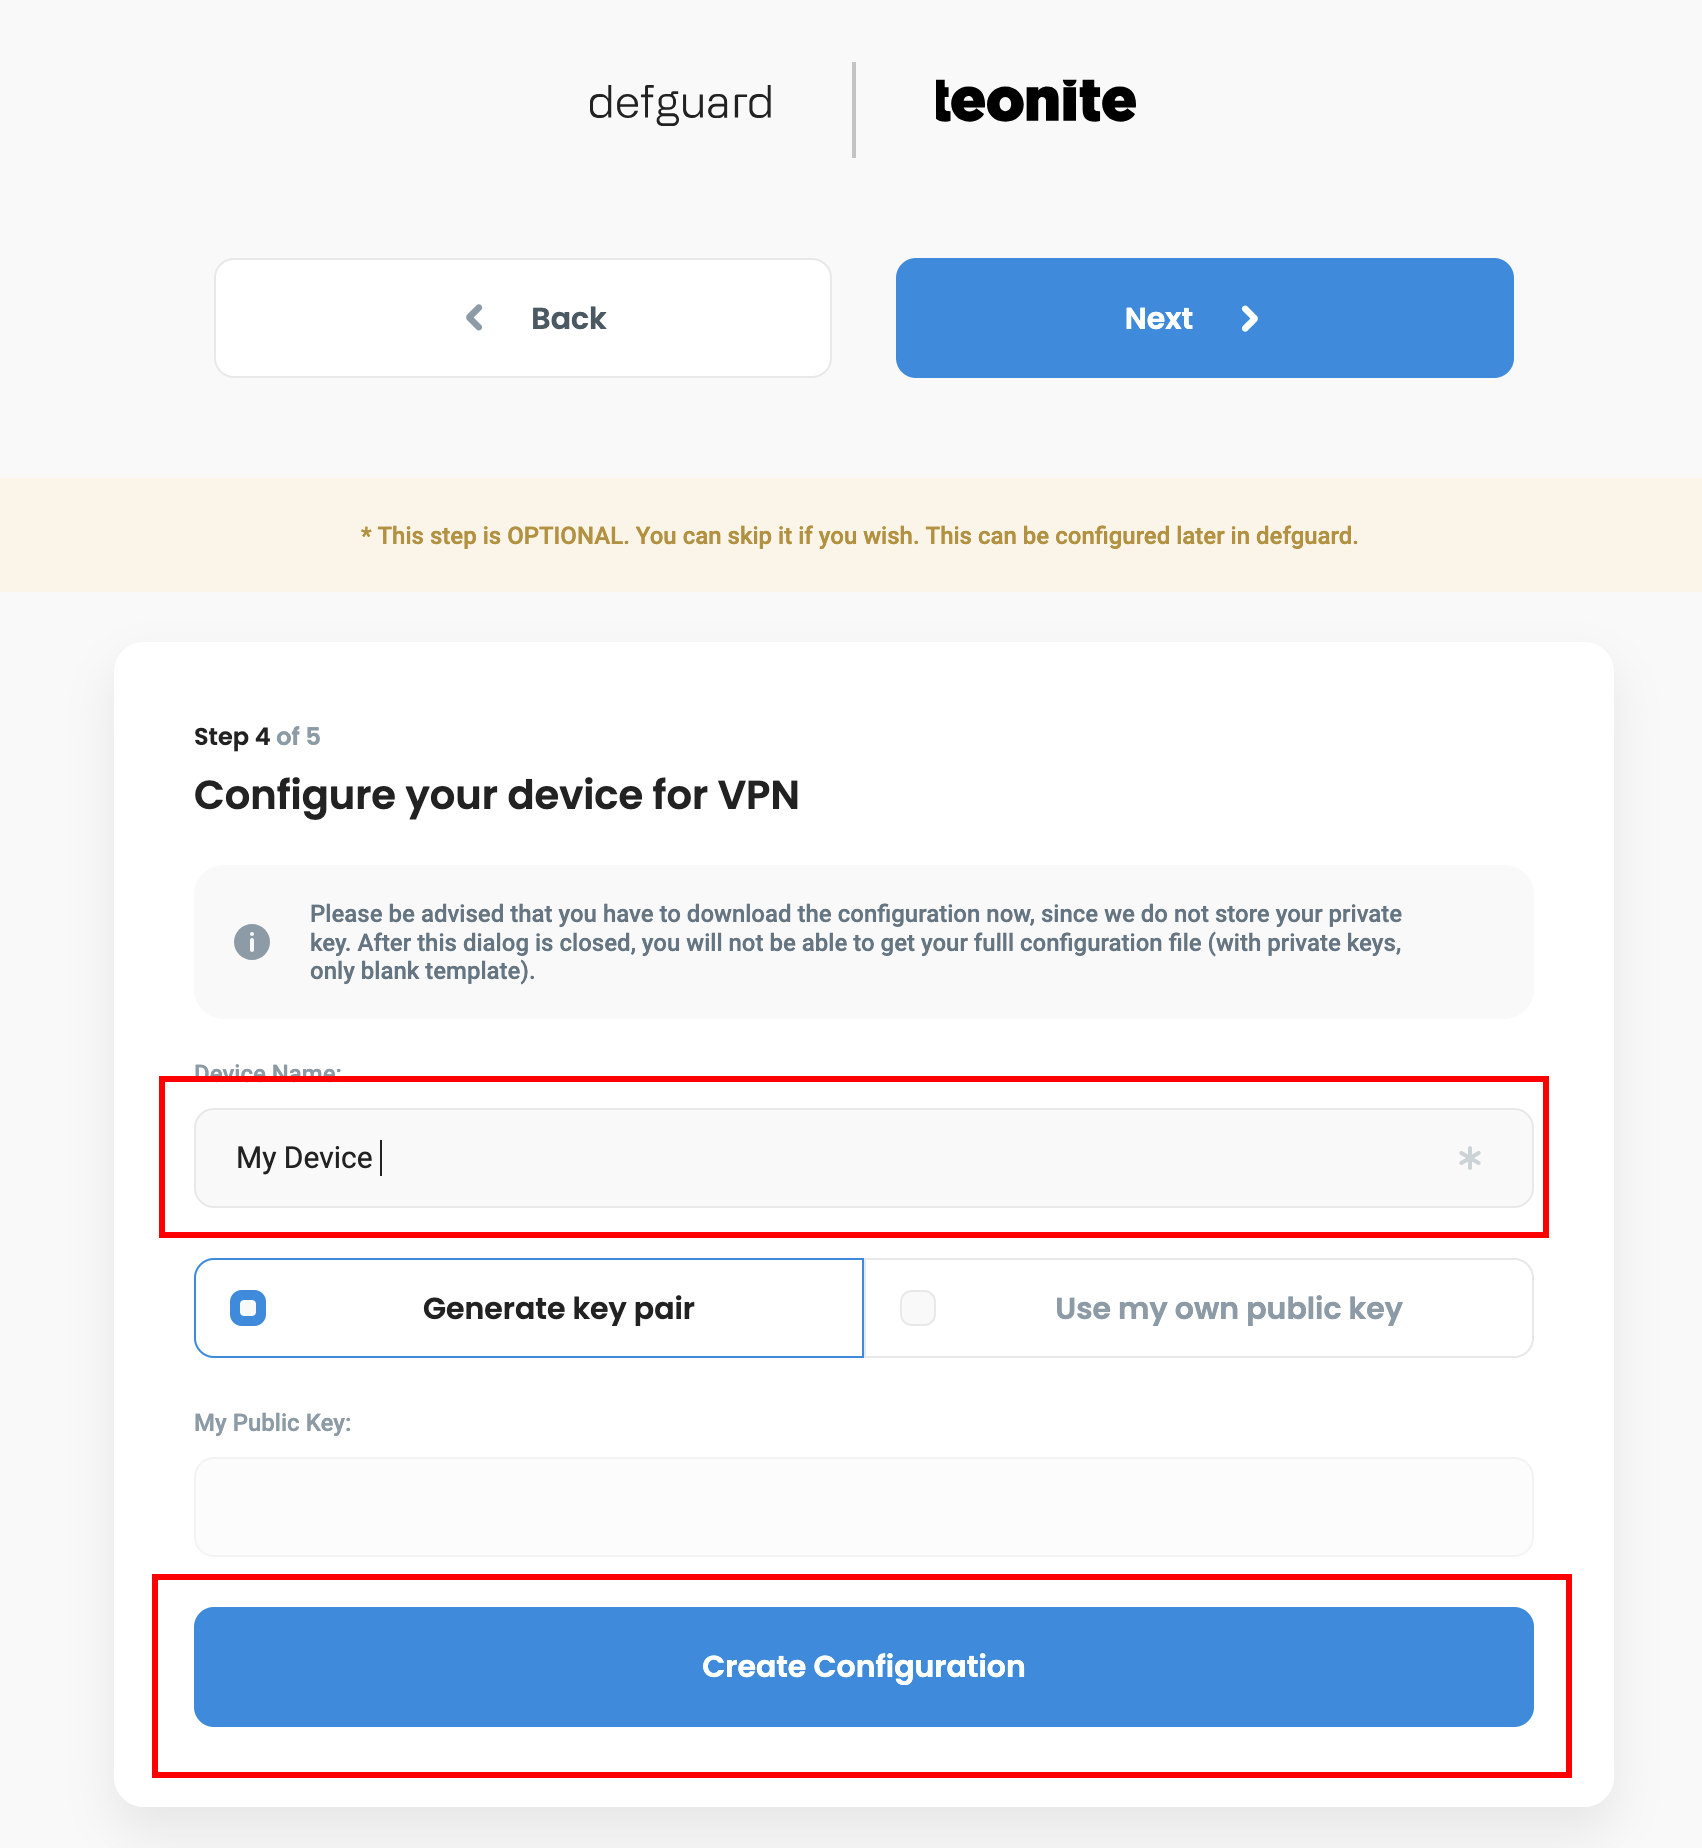
4. This is the step where we can add our mobile device. Enter the name of your device, then click **Create Configuration**.
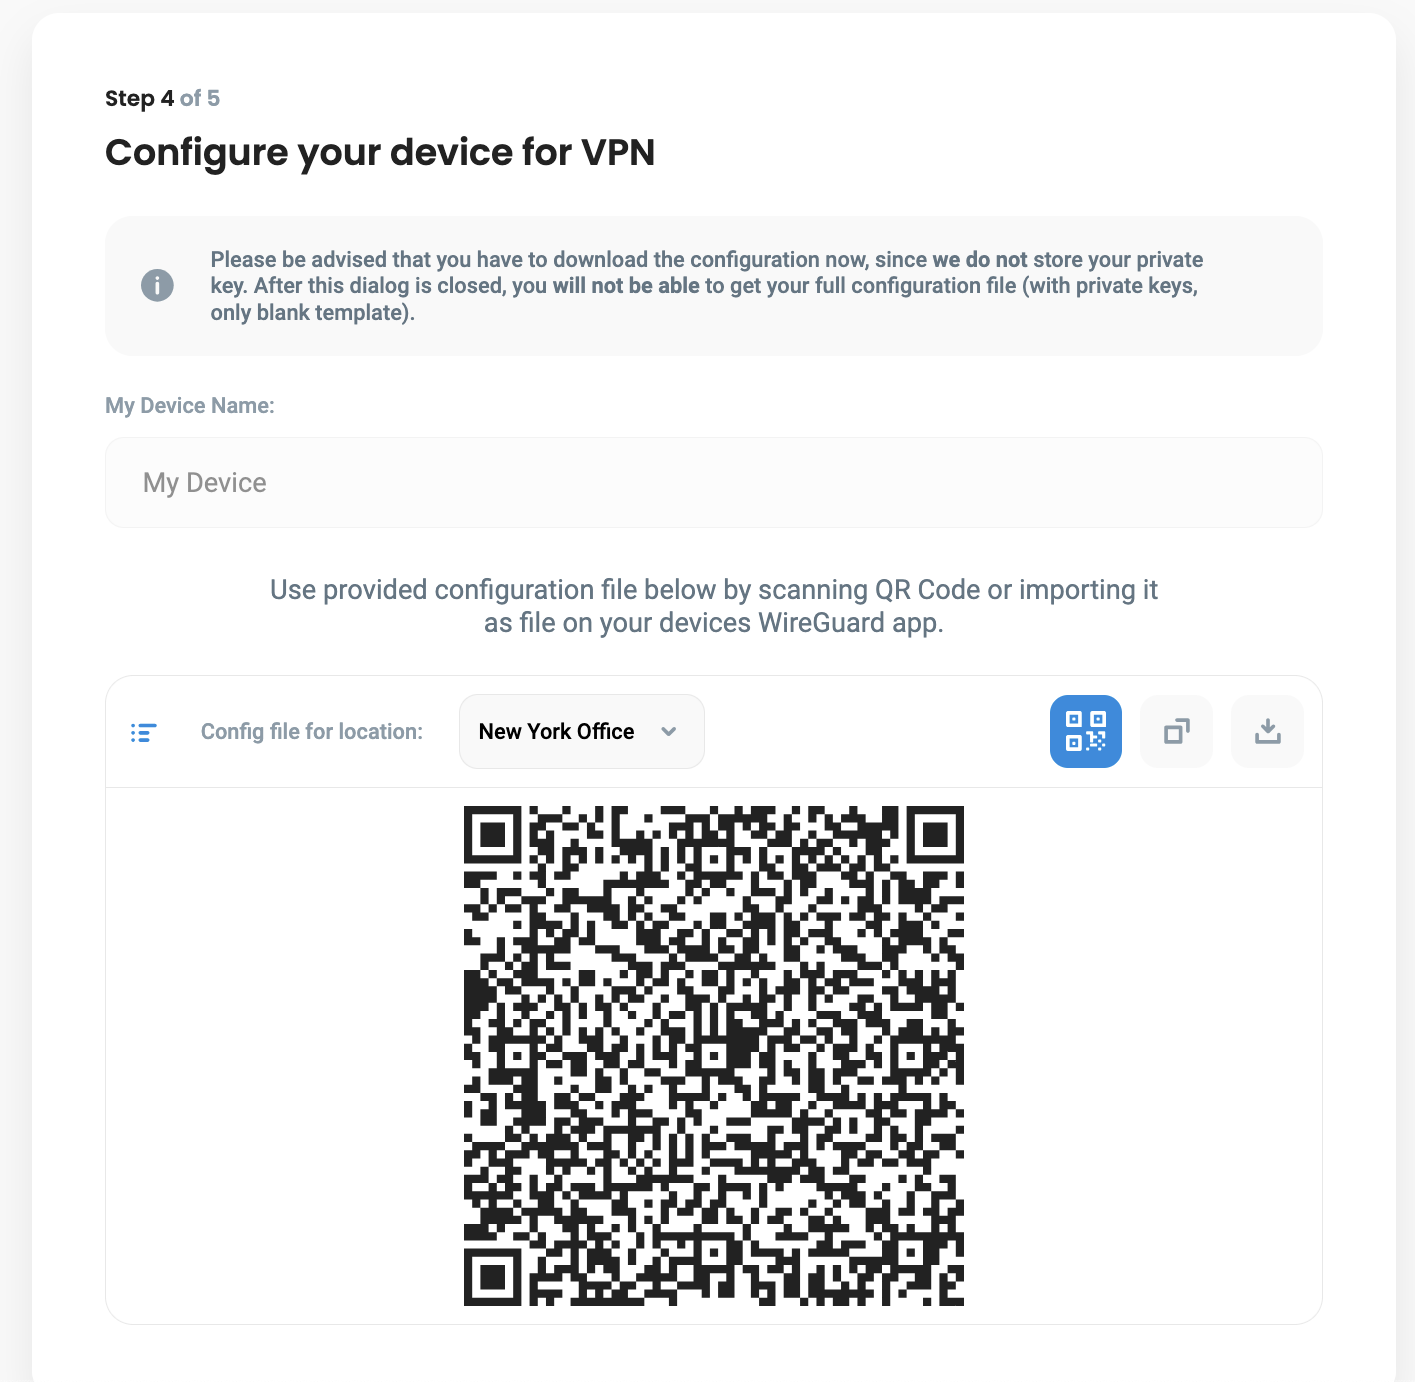
5. You will see a screen like this.
6. Open Defguard on your mobile device. Click **Scan QR Code**, and scan the code from **step 5**.
7. After scanning the QR code, enter the name of your device and confirm.
{% hint style="info" %}
If you can't scan QR Code, select **Add Instance Manually** in **step 6** and enter URL and Token from **step 5**.
{% endhint %}
## Adding Instance in Defguard
1. Log in to your Defguard account.
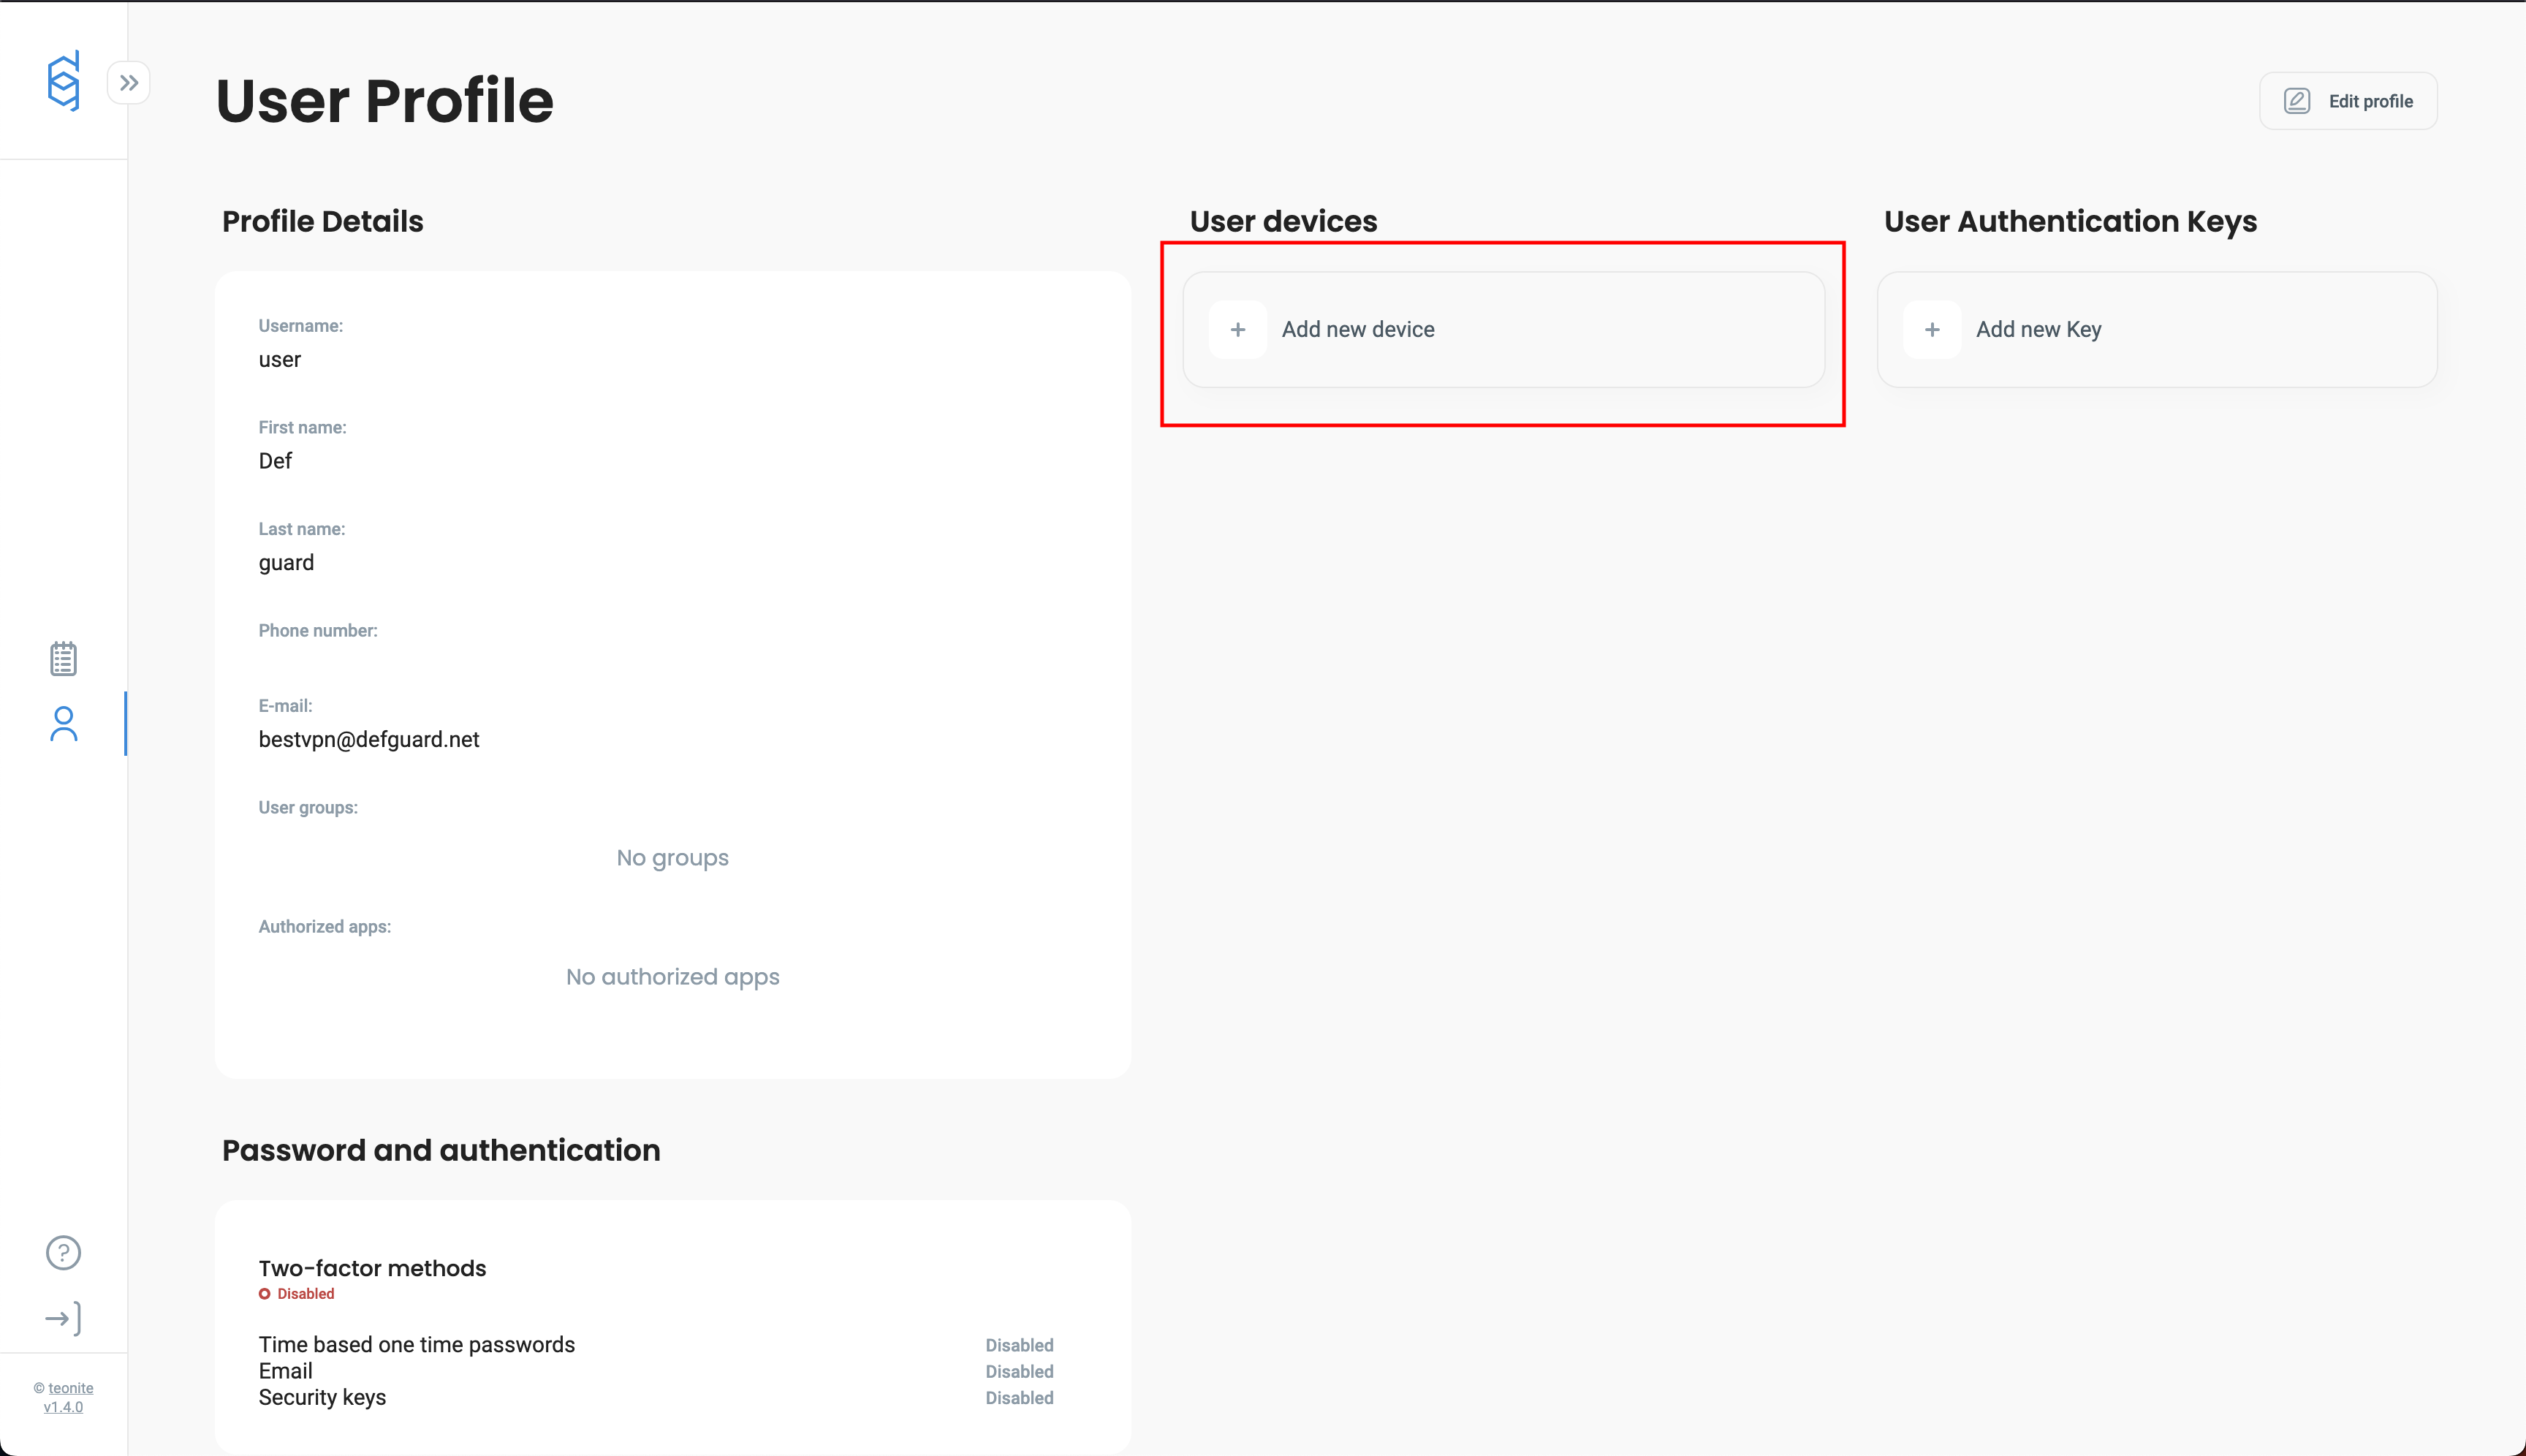
2. Go to **My Profile** tab.
3. Click **Add new device** button inside **User Devices** list.
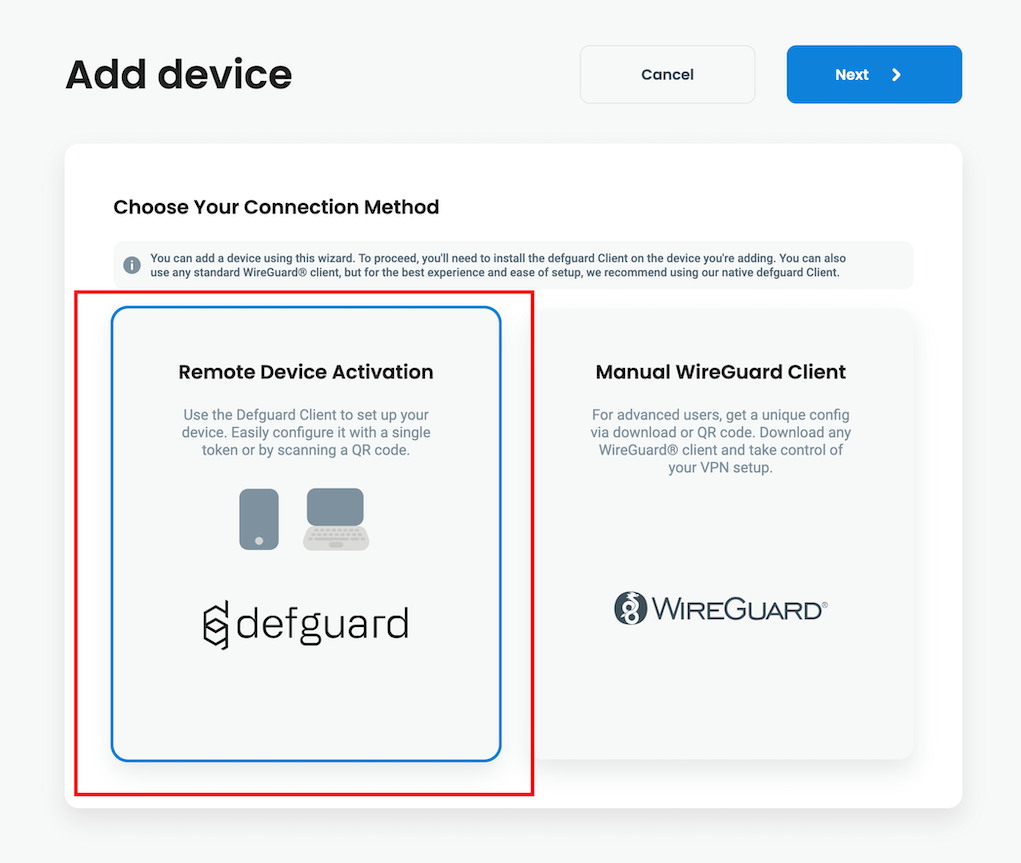
4. Select **Remote Device Activation** and click **Next**.
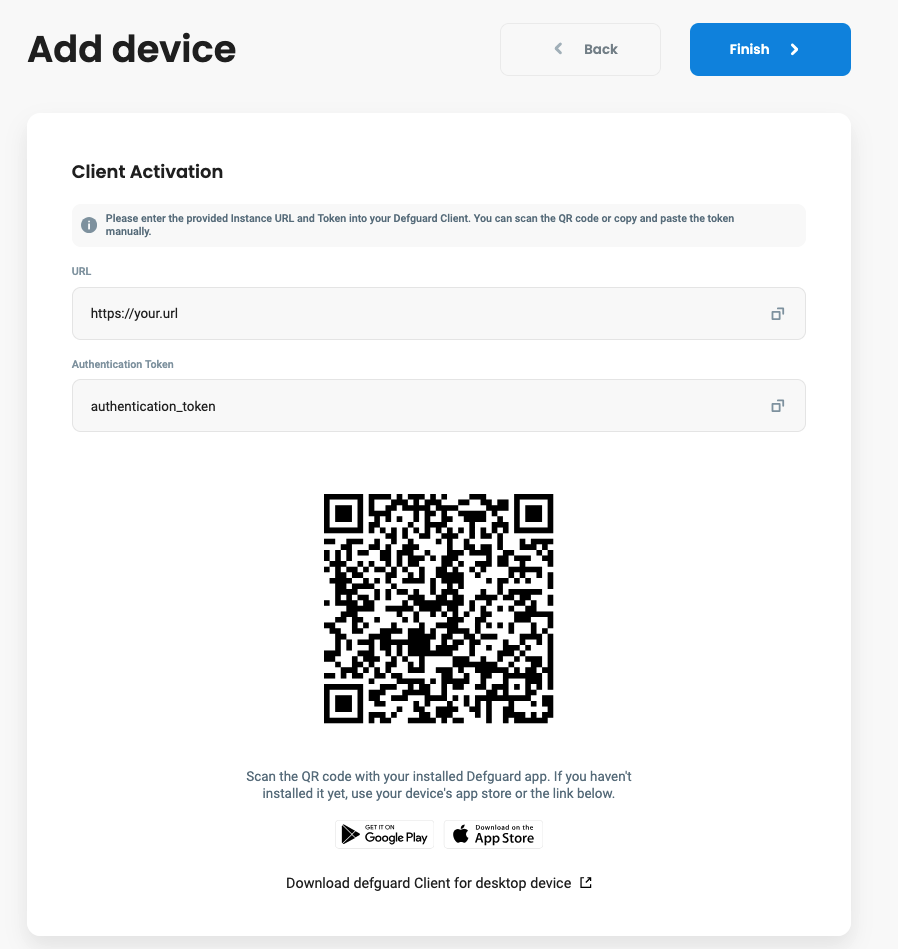
5. After that you will see URL, Token and QR Code. **Take a screenshot of QR code**, we will need it in next step.
6. Open Defguard Mobile on your smartphone
7. Click **Scan QR Code**
8. Scan QR generated in step 5.
9. Enter the name of your device. For example "iPhone 11"
10. Confirm
{% hint style="info" %}
If you can't scan QR Code, select **Add Instance Manually** in **step 4** and enter URL and Token from **step 5**.
{% endhint %}