> For the complete documentation index, see [llms.txt](https://docs.defguard.net/llms.txt). Markdown versions of documentation pages are available by appending `.md` to page URLs; this page is available as [Markdown](https://docs.defguard.net/1.4/features/external-openid-providers/zitadel.md).
# Zitadel
{% hint style="info" %}
Refer to [Zitadel's documentation](https://zitadel.com/docs) on how to install it.
{% endhint %}
1. Log in to Zitadel's web interface.
2. Create a project.
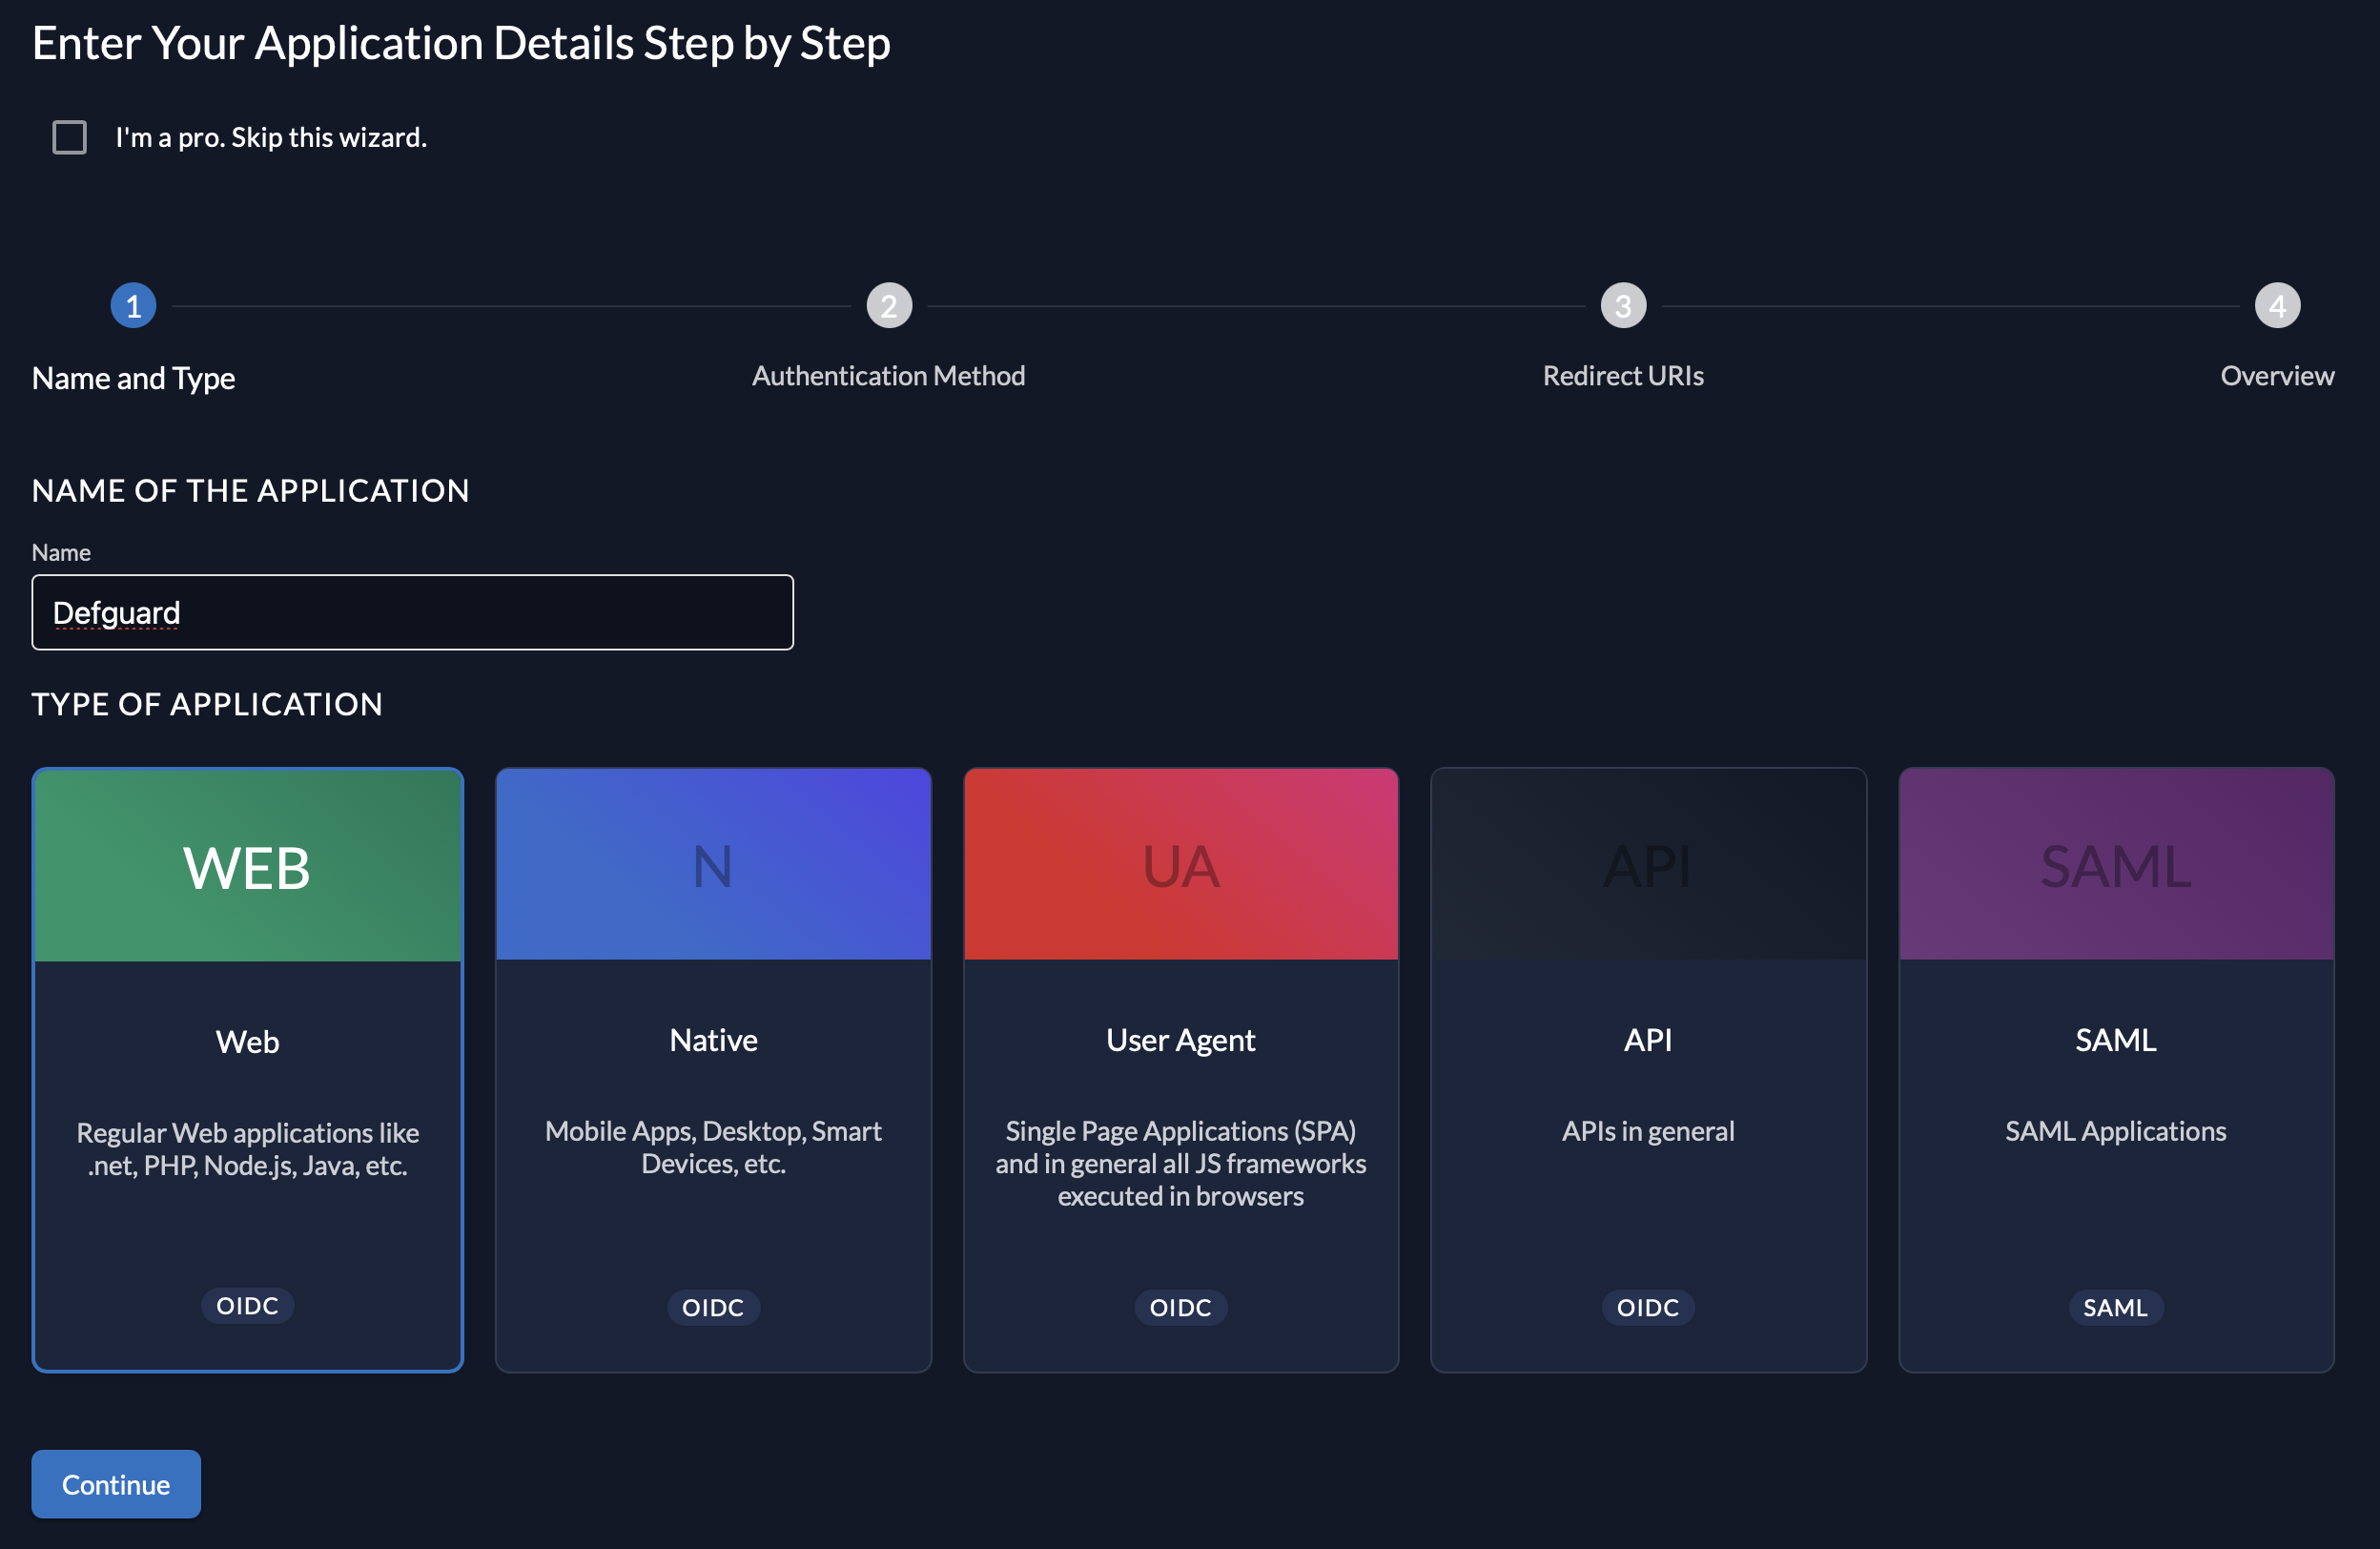
3. Add a new application within the project.
4. Select **Web** for application type.
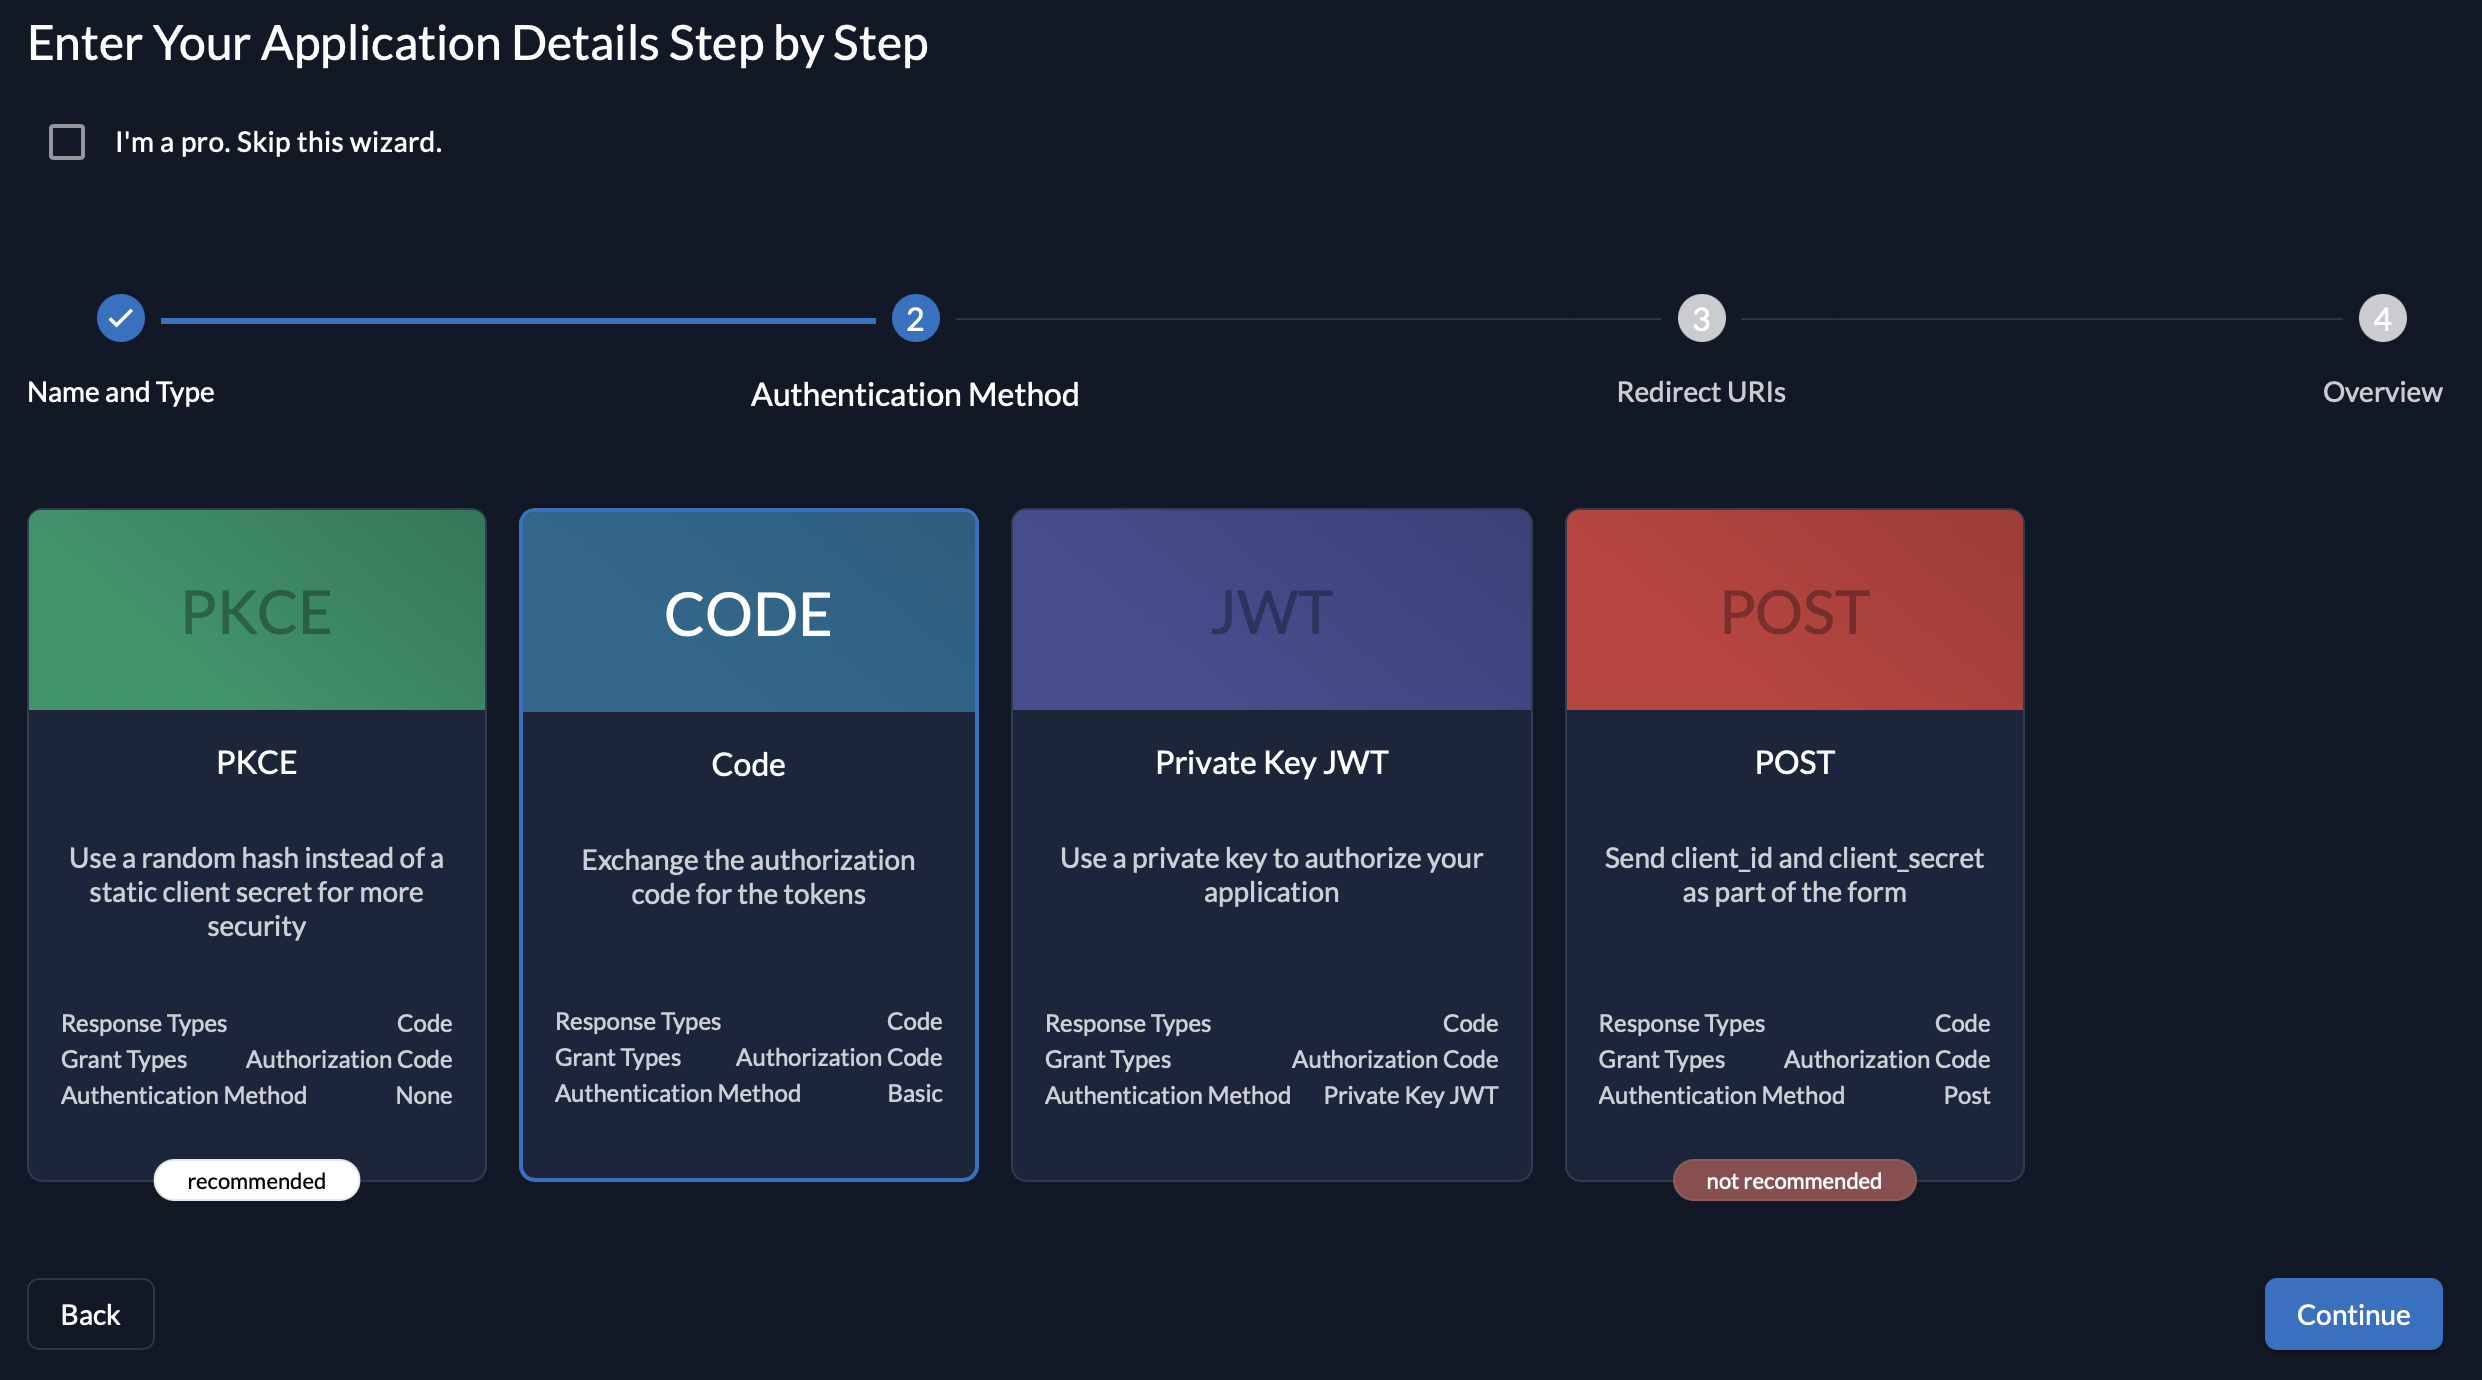
5. Choose **Code** for authorization method.
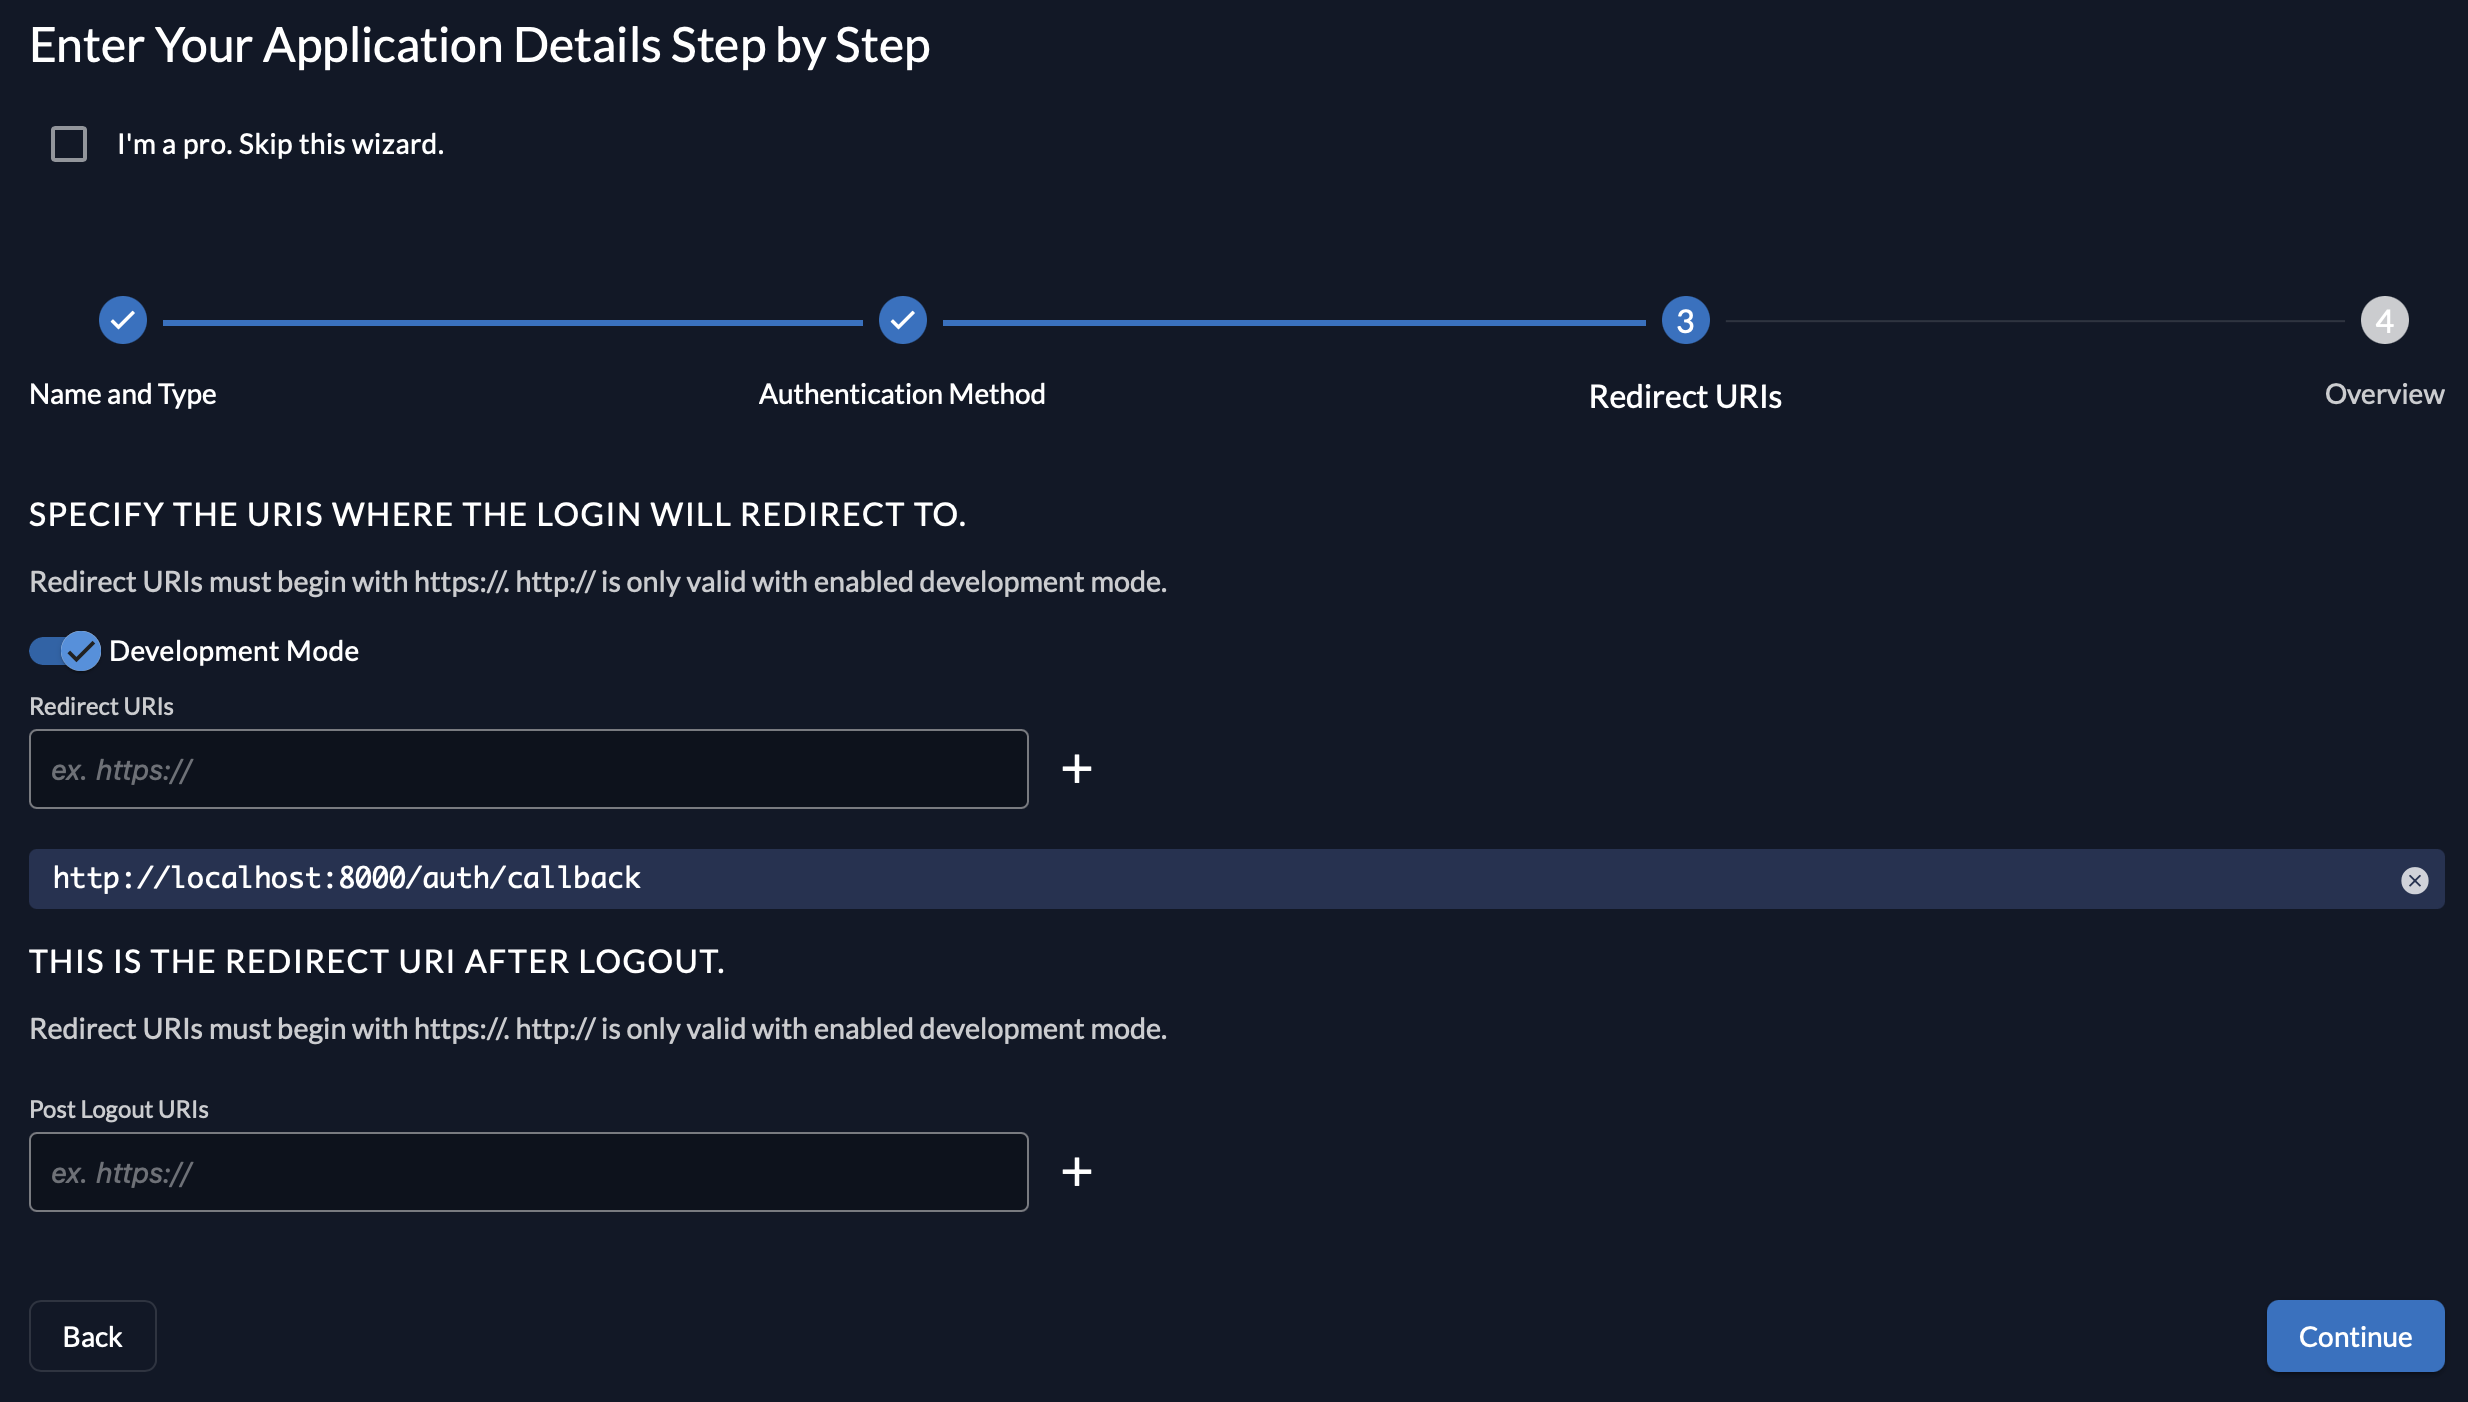
6. Enter a redirect URI for your Defguard instance. The URI is in the form `/auth/callback`, for example `https://defguard.example.com/auth/callback`. (If Defguard has been launched on the *localhost*, select **Development Mode** and enter `http://localhost:8000/auth/callback`). If you'd like to use OpenID enrollment through proxy, make sure to enter an additional URI here in the form of `/openid/callback`.
7. **Create** the application.
8. Copy the provided **Client ID** and **Client Secret** and enter these in the Defguard's OpenID settings.
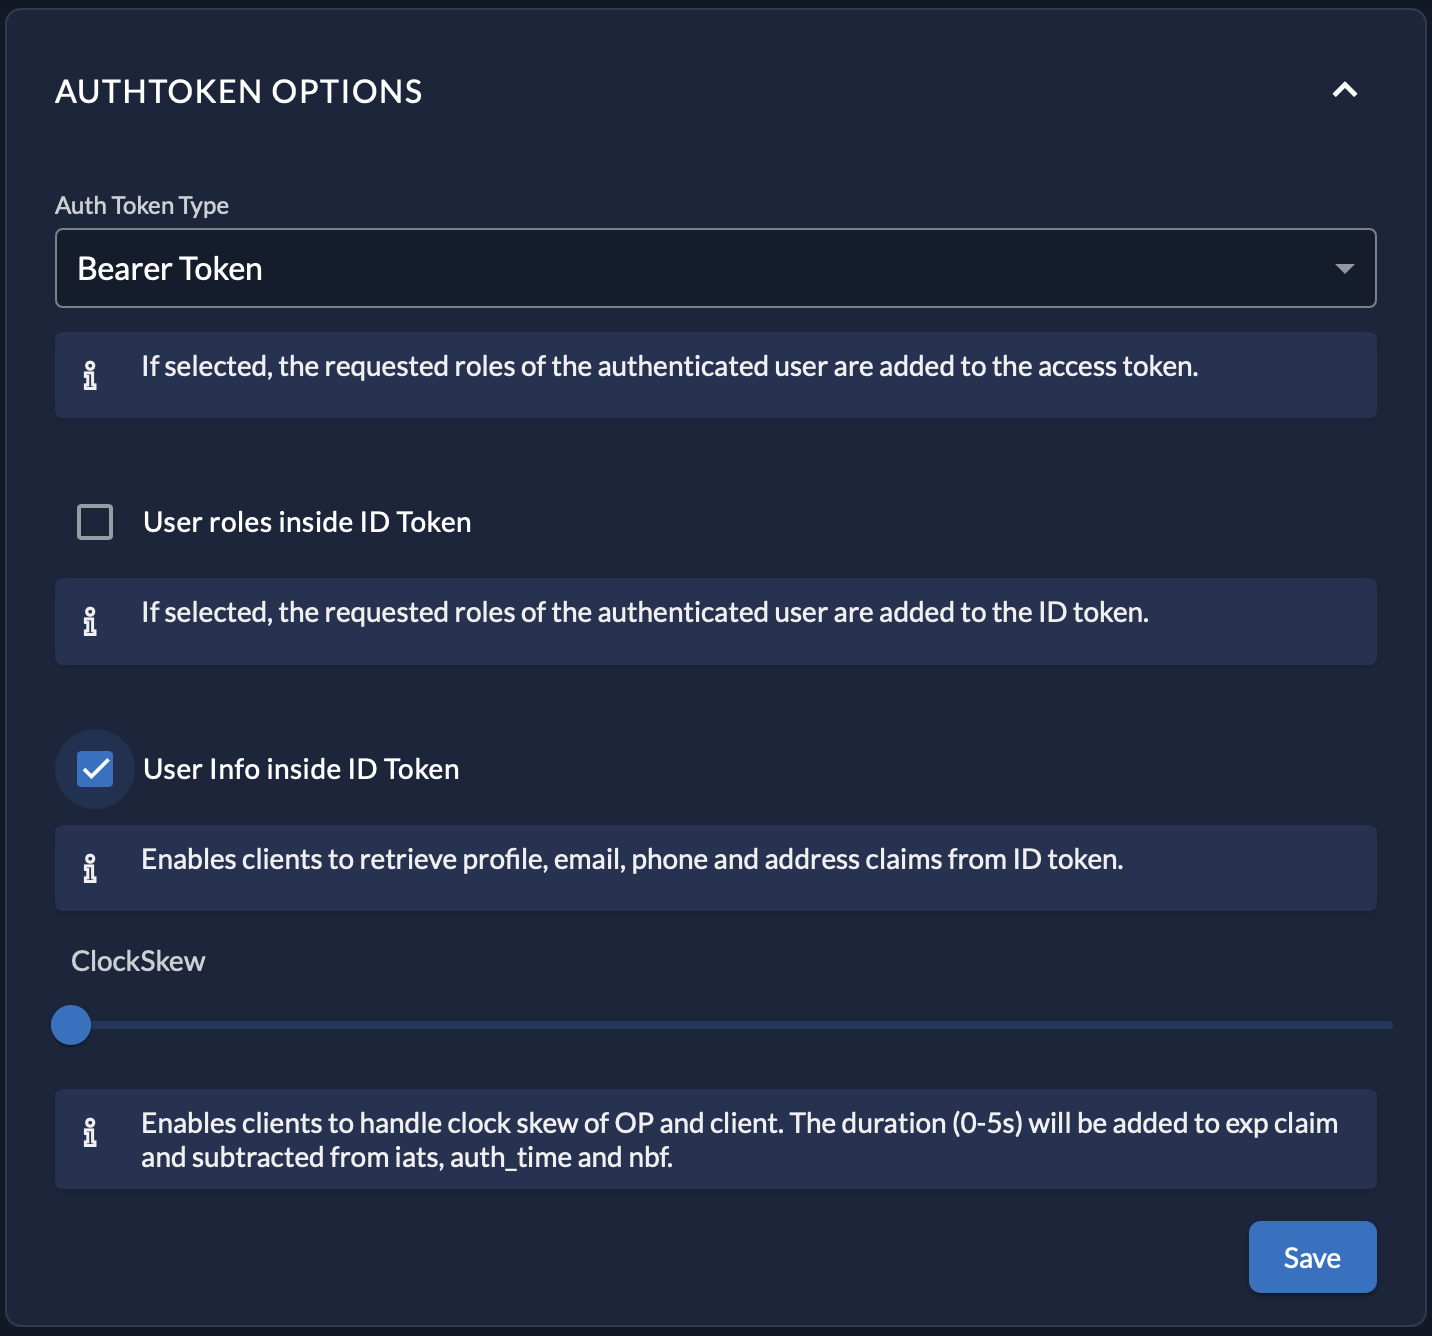
9. Finally, in the **Token Settings**, enable **User Info inside ID Token**.